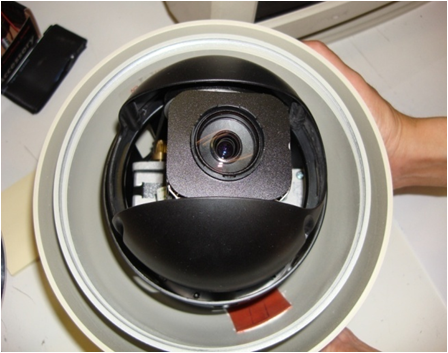
 | Uncover the dome shape glass on the top of camera, then
place the camera vertically to the center part of camera out. |
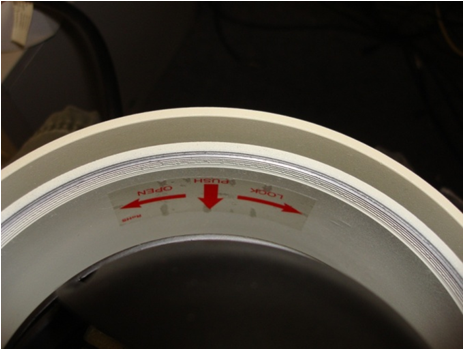 | Follow the instruction lable inside the case of the camera,
push the center part of the camera then twist it to left to
open. |
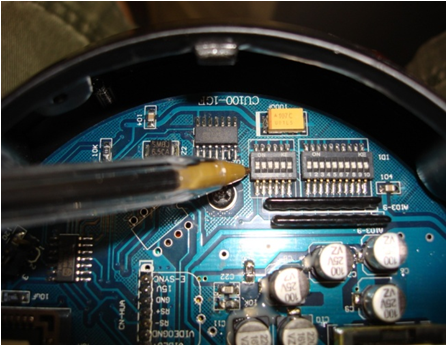 | Take the center part out and flip it to the other side,
there are two dip switches that we need to setup before we use.
The one on the left is Protocol Select switch, and the right one
is Address Select switch. For this demo, we are using "Samsung
1600(SPD-1600)". Thus, DIP-1 and DIP-2 of Protocaol Select
switch should be ON and the rest of Protocaol Select should be
OFF. (Note: For more details of Protocol Selection switch,
please go through the PTZ manual and look for more setting of
different brands.) |
 | This table shows states of coding switches of protocols
selected by the PTZ camera. |
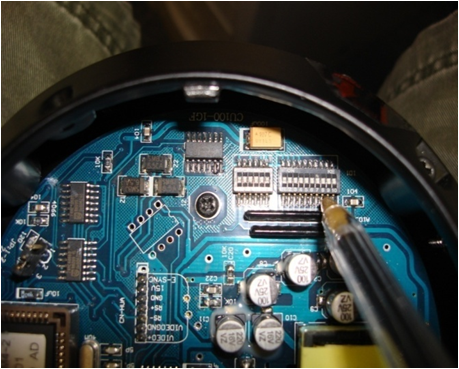 | For the setting of Address Select switch, it is used to set
address of the PTZ camera from 1- 1023. The coding switches from
DIP-10 to DIP-1 are equivalent to a 10-bit binary digital. The
state "ON" of each bit means 1 while "OFF" means 0. For this
example, we are using address 1 for this PTZ camera 1, i will
set DIP-1 to ON, and the rest of them are OFF. |
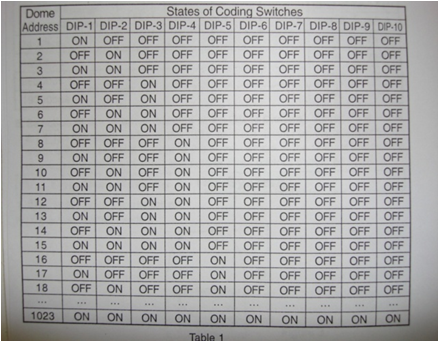 | This table shows states of coding switches of some
addresses. |
 | Place the center part to the right positin inside the metal
case. Follow the instruction label inside the case of the
camera, push the center part of the camera then twist it to
right to lock. |
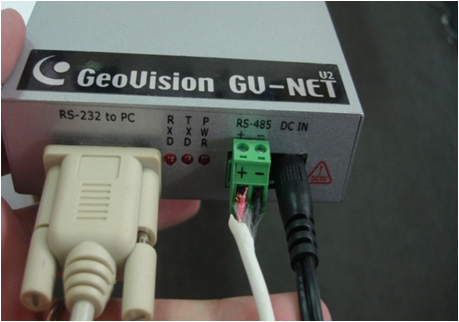 | Connect RS-485 wires to the GV-Net Box and RS-232 goes to
COM port on the computer. |
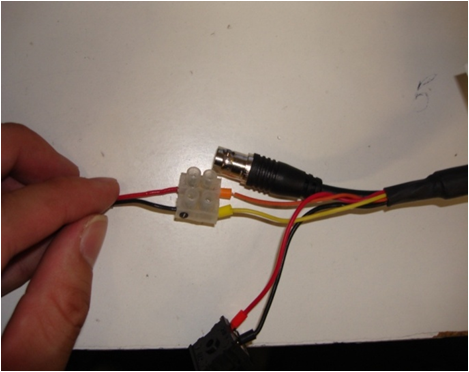 | Make a connection with the other end of I-O cable to the
RS485 Control connector of PTZ camera. Red to orange, black to
yellow. |
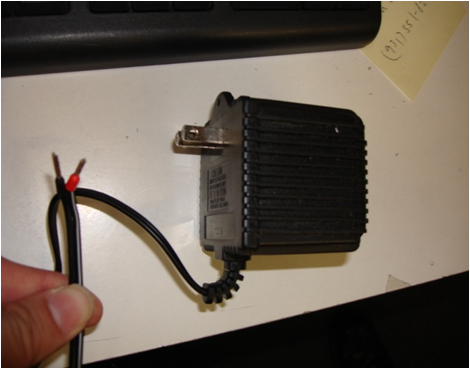 | There are also two different wires on the other end of
adaptor. Black -- (-), Red -- (+) |
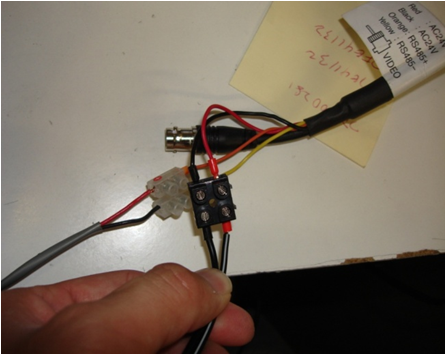 | Make a connection with the other end of adaptor to the Power
In Connector of PTZ camera. Black to Black, Red to Red |
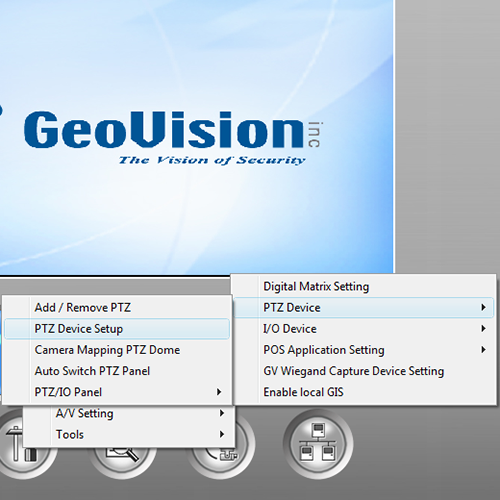 | Click on the Configure button and navigate to Accessories->PTZ Device->Add/Remove PTZ |
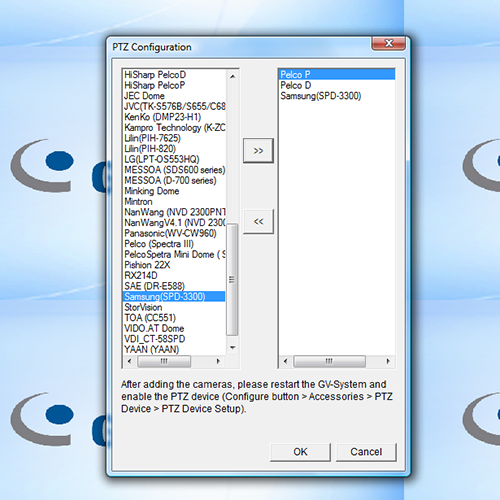 | Make sure to select your model or protocol from the left column and use the button with the "right" arrows to add that protocol to the list of protocols to use. After clicking on OK, make sure to restart the software. |
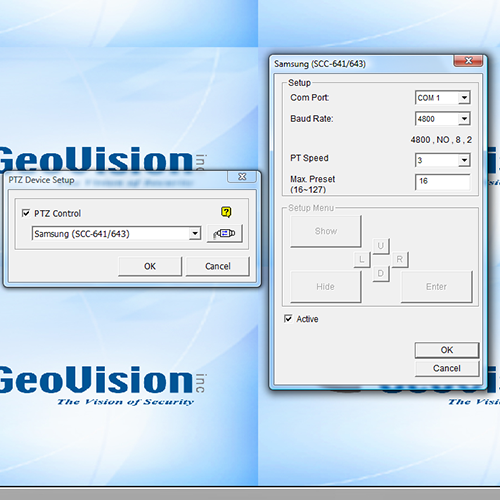 | Click on the Configure button and navigate to Accessories->PTZ Device->PTZ Device Setup and the following menus should appear. Select the protocol for the camera you are adding and make sure to activate PTZ control using the checkbox. Click on the button next to the name of the protocol and you should be taken to the setup page for that protocol. Make sure you are matching the correct Com Port and baud rate and also mark the protocol as "Active". Click on all OK buttons until you have exited all menus. |
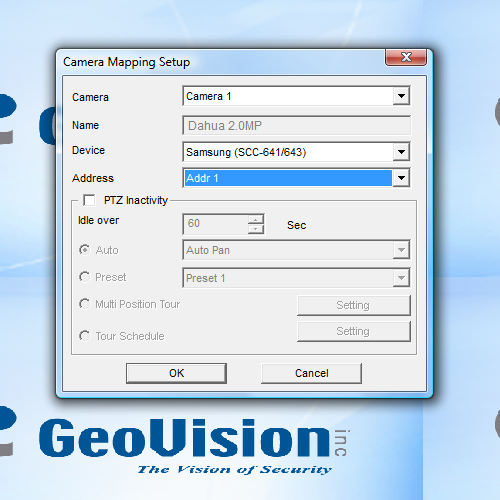 | Click on the Configure button and navigate to Accessories->PTZ Device->Camera Mapping PTZ Dome and the following menus should appear. For the corresponding PTZ camera channel, make sure to select the protocol from the Device drop-down field and then make sure to use the correct address configured earlier. Click on "OK" to save all settings |
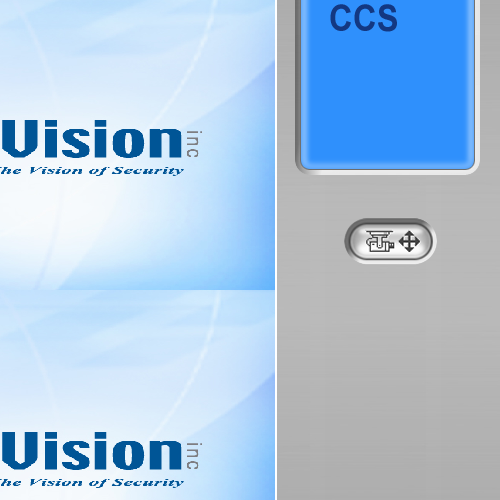 | Find the PTZ control button under the blue information column on the right side of the MultiCam window and click on it to pop out the PTZ menu. |
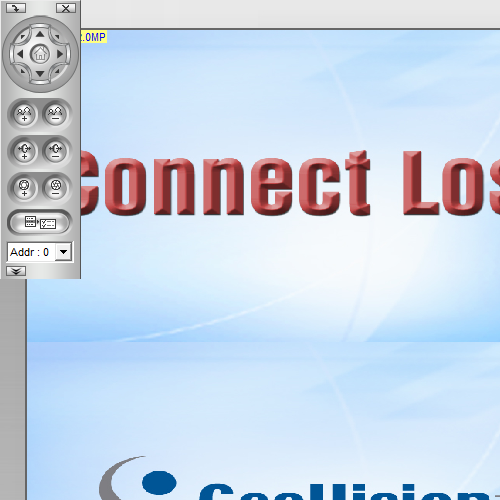 | Now, when your PTZ camera is in a single channel view, you should now be able to control the camera with the PTZ controls shown in this control panel, including zoom and focus. |


