GeoVision How do I setup GF1912?
GeoVision
Back to GeoVision Support | Support Home
Back to GeoVision Support | Support Home
- To Setup GF1912, follow the instruction as stated below:
- Connect power to GF1912: connect VIN port on GV-GF1912 to 12V port on AS400 or any other 12V source. Connect GND port on GV-GF1912 to GND port on AS400 or any other GND source.
- Connect network to GF1912: connect GF1912 to a network switch via an Ethernet cable.
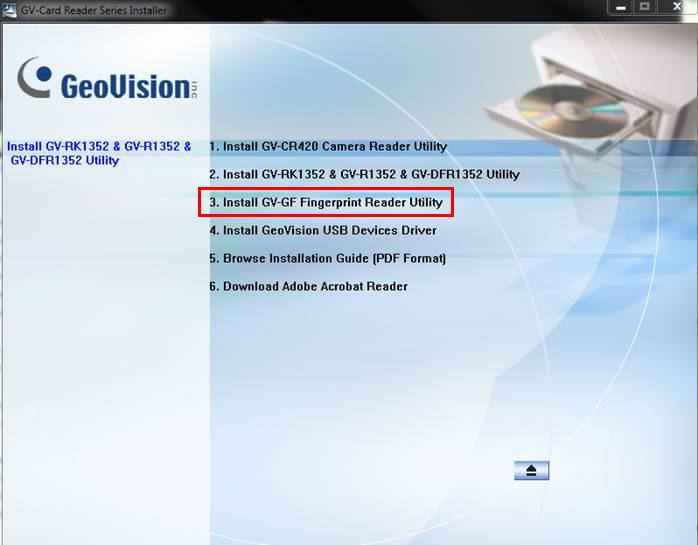
- Insert the disk labeled “GV-Card Reader Series Installer”.
- Select “Install GV-GF Fingerprint Reader Utility”
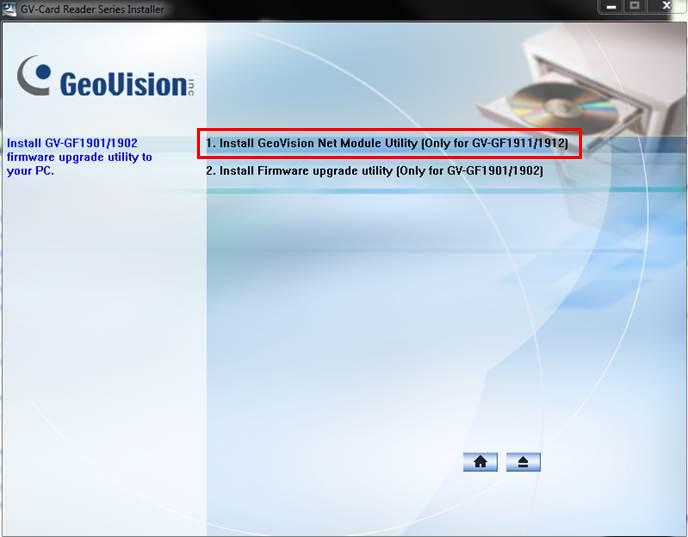
- Select “Install GeoVision Net Module Utility (Only for GV-GF1911/1912)”
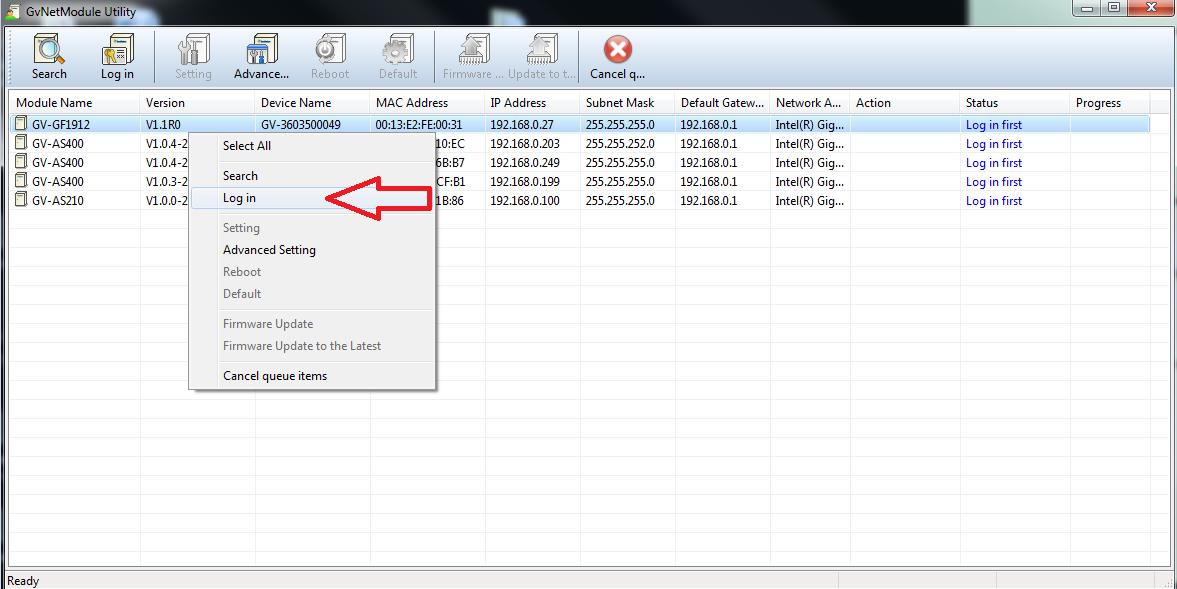
- Once installation is finished, locate GVNetModule Utility under Windows Start, Programs.
- The utility should scan for available readers on the network, right-click on the desired GF1912 and select Log in with ID: admin and Password: admin.
- Once login is successful, right-click on the GF1912 again and select Settings.
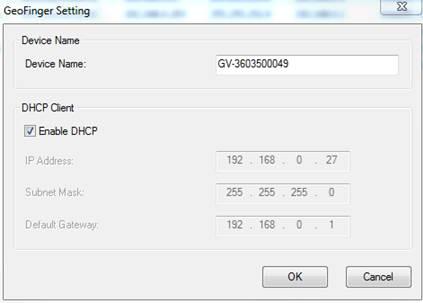
- If static IP address is to be assigned, uncheck "Enable DHCP" and enter desired network properties accordingly for this GF1912.
- Click OK.
- right-click on the GF1912 again and select Advanced Settings.
- Enter with ID: admin and Password: admin to login on the GF1912 web interface.
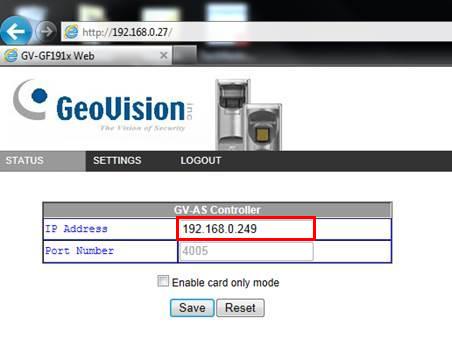
- Go to Settings , then GV-AS Controller and input the AS Controller’s IP address, then click Save button.
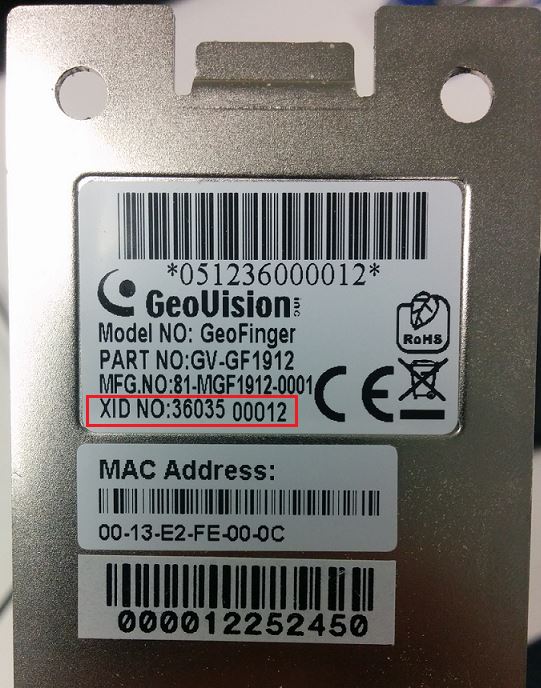
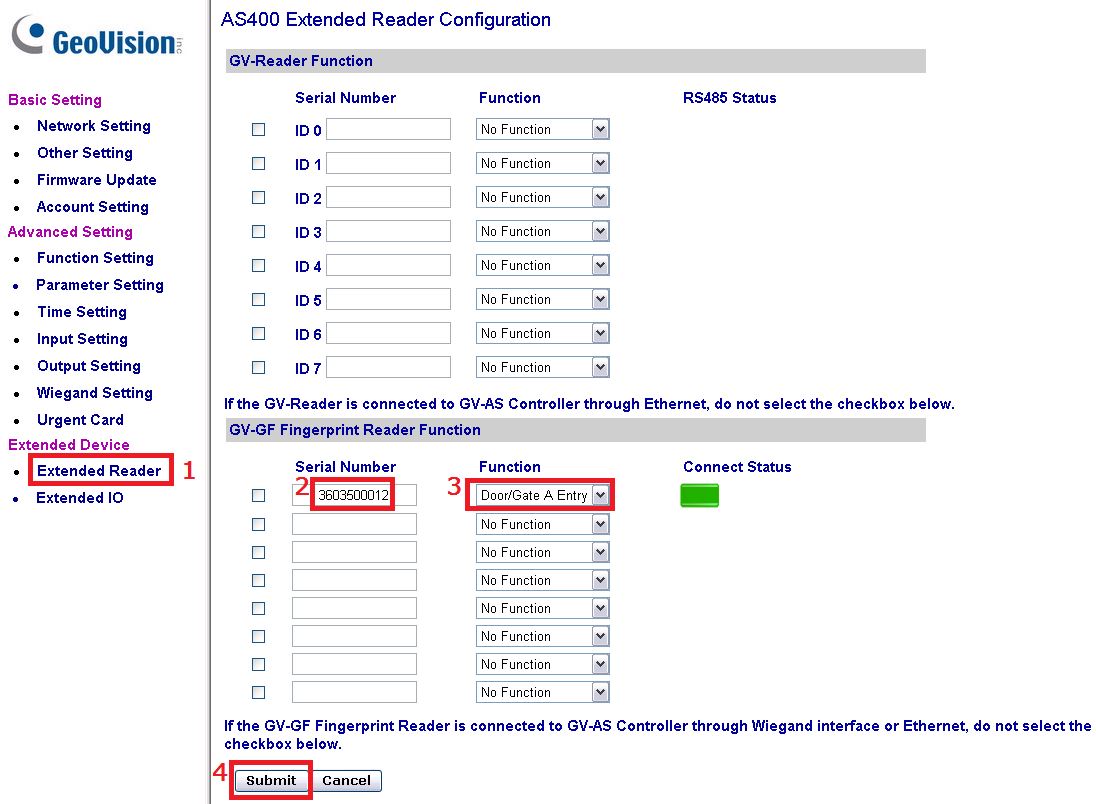
- Go to AS-Controller's Web Interface, under Extended Reader section and enter the XID NO of the GeoFinger reader (printed on the back of the reader), then select the Function, click Submit.
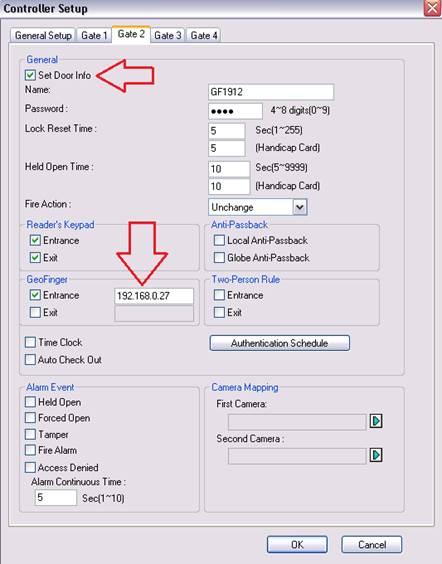
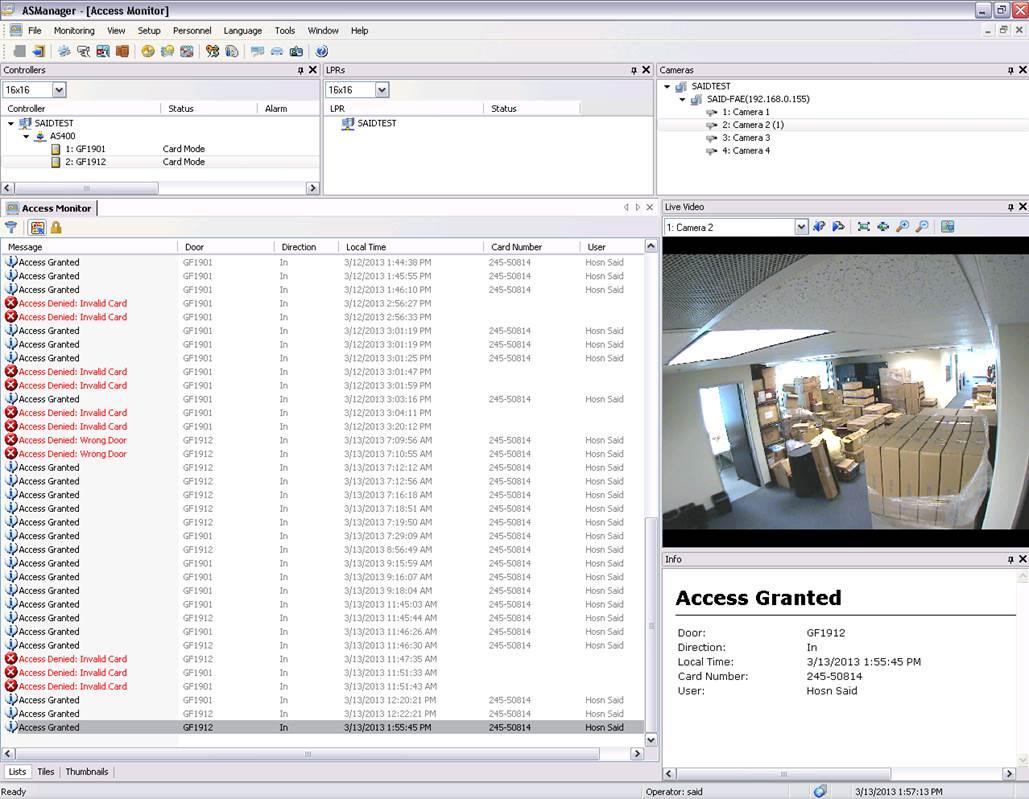
Note, do not enable the check box. - In ASManager, enable a Gate under Controller Setup, then check either Entrance or Exit and enter the IP address of the GF1912 in the blank box on the right.
- Click OK.
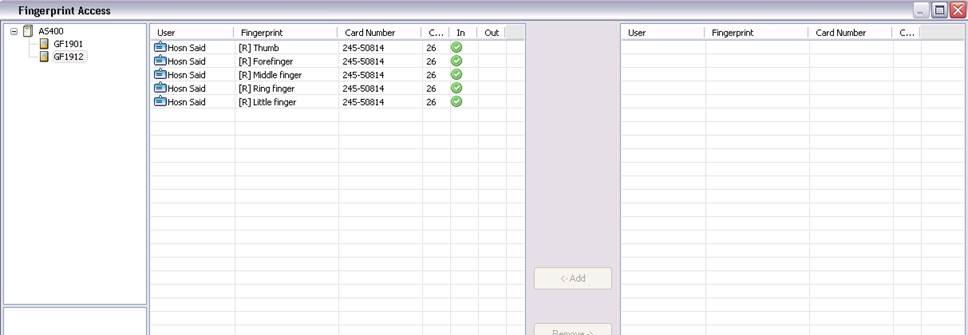
- Go to Setup , then Fingerprint Access, assign the desired fingerprints to the appropriate gate.
- After the fingerprints are saved, GF1912 is now functional.