

Quick Start Guide for Video Server (Geovision)
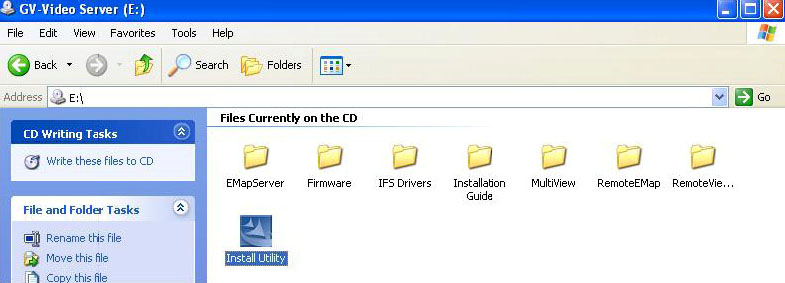
| Connect your computer with Video Server using a hub, then follow the step below for installation. 1. Browse the Setup CD of Video Server, and install the Utility for setup. |
 |
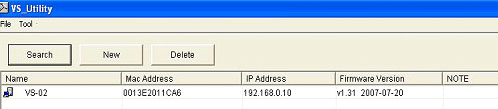
| 2. Run the VS_Utility from the Program List, and you will see the following screen, then click Search button to search your device inyour network. |
 |
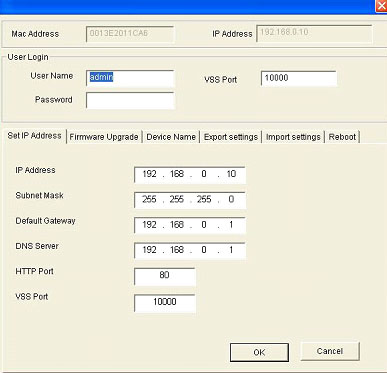
| 3. Edit the IP address for the Video Server to match your subnet mask of the network. Default username and password are both admin. Then click OK after configuration. |
 |
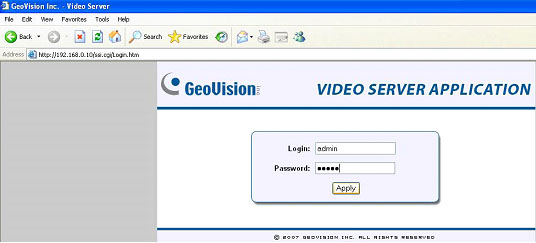
| 4. Type in the Video Server IP address on Internet Explorer, type in 192.168.0.10 based on this example. You will get into the following screen. Login and password are both admin as default. |
 |
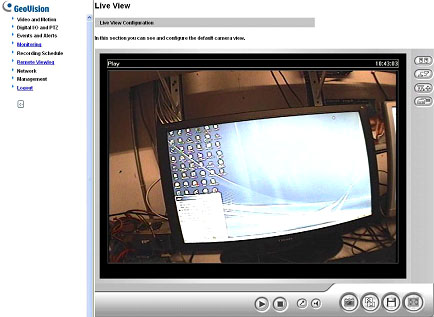
| 5. If there is no problem, you will see the image show up on the live view. |
 |
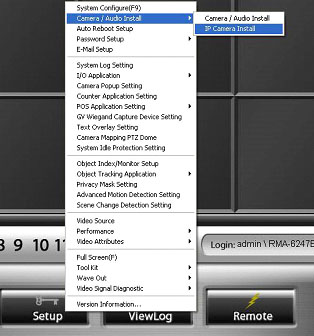
| 6. You have to setup the software and let Multicam software see the Video Server as well. Click Setup > Camera/ Audio Install > IP Camera Install Note: This feature can be available for the version later than 8.1 |
 |
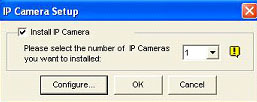
| 7. Check Install IP Camera, and select the number of IP Cameras you want to be installed, and then click on Configure� |
 |
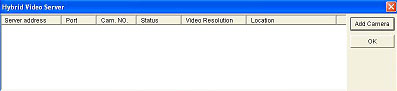
| 8. Click on Add Camera. |
 |
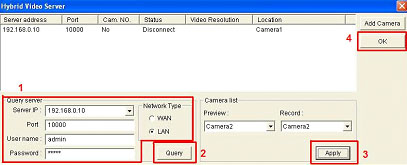
| 9. Input the Server IP, VSS Port, username, password, and network type. Then, click Query, and select camera from the camera list, then click Apply. When everything is done, click OK. |
 |
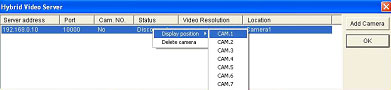
| 10. Select the new added camera on the list, and pick the display position on which channel. |
 |


