

iMaxCamPro (Bronze, Gold, Platinum) Web Service Walkthrough (remote access through IE, Chrome or Firefox)
Back to iMaxCamPro Support | Support Home
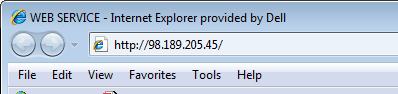
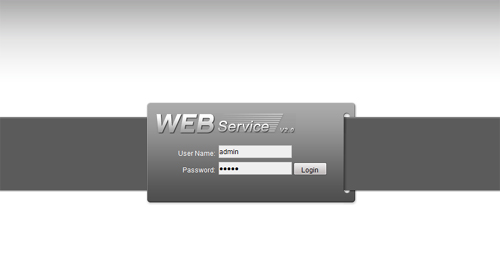
Step 1
Start by accessing the DVR through your Internet Explorer web browser. Enter in the correct IP address through the address bar at the top of the page and login.
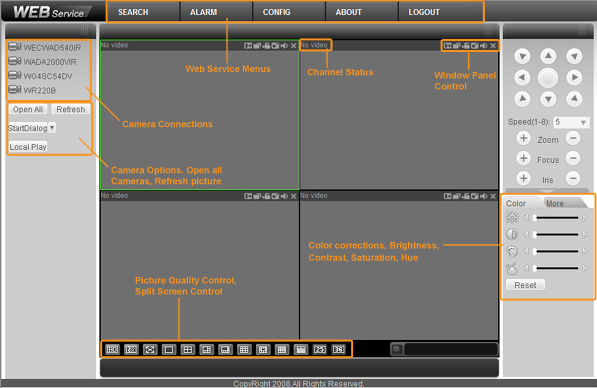
Step 2
Once logged in you should see the interface shown below. Take note to the various options through out the interface.
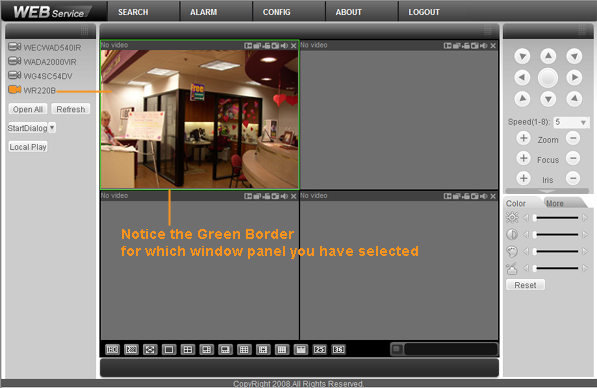
Step 3
To simply connect on to individual channels, select the window panel you want to stream to by left clicking it (a green border should be present). Now on the left hand side, click the channel (CAM) you want to stream. You can use the preview mode towards the bottom right to bring in multiple channels in to the same window panel.
Step 4
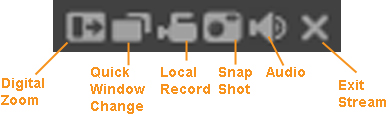
Quick window panel features have been added for ease of control for streaming live video or playing back. In each window panel you will see a set of icons in the top right hand corner. Described from left to right: Digital zooming, Quick view change, Local streaming recording, Snap shot, Enable/Disable audio, Exit current stream. These options are detailed more in the unit’s manual.
Step 5
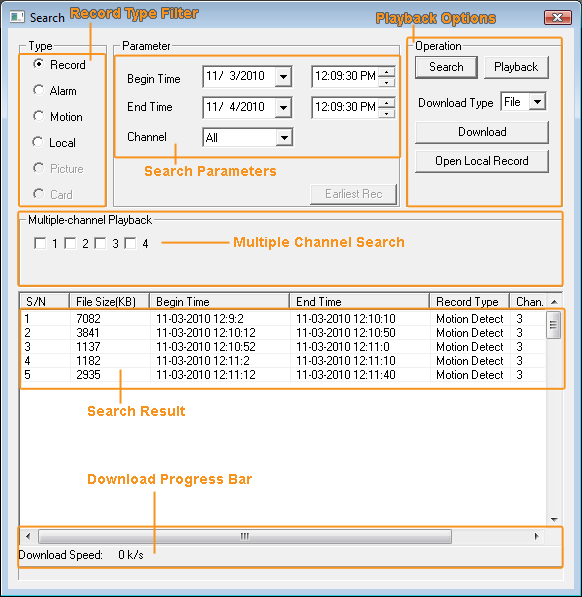
Since you now know how to simply stream your cameras, lets look at the several other options towards the top of the interface’s page. Starting with the playback feature of the interface, click the “playback” button. Playing back is made even easier through our redeveloped interface. Start out by choosing a recording type you want to filter out, configure the times in which you are searching for, and finally choose a single channel to start the search with. You may search up to 4 channels at a time with the option below your parameter section. Proceed with clicking the search button in the upper right panel of the screen to bring in the results. Double click on any given result that is displayed to start playing it or highlight it and press download to have it directly downloaded on to your local hard drive.
Step 6
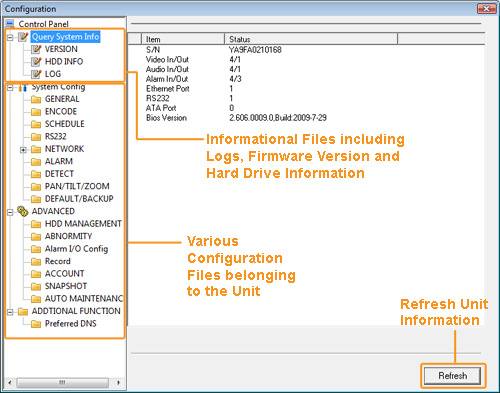
To gain access to the DVR’s configuration files, click on the “setup” button. This menu will give you the ability to change/view various options in the DVR such as your schedule, channel quality, the ability to view log files, create user accounts and much more. The sub categories match with the DVR’s interface so it’s an easier transition when wanting to configure through the software level. The setup menu is described in more detail in the unit’s manual.
Step 7
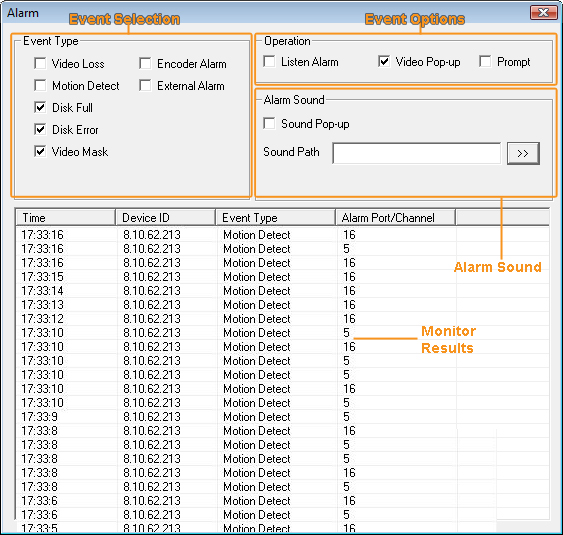
Next on the list is the event menu. Click on the “event” button at the top of the interface to bring it up. This option allows you to trigger certain events when caused by something such as motion, hard drive errors, vide masking and more. Once you check mark the events you want the system to alert you for, check mark on the operation you want it to perform when said event triggers. You can also allow the event to trigger an auditable sound by setting the options under “alarm sound”. A constant log should be kept for the remainder of the time you have these events activated.
Step 8
The last two options that are left are “info” and “logout”. Click on the “info” button to bring up the current version of the web client you are working on. Click on the “logout” button to log you off the current user.
Note: Please refer to your unit’s manual for more detailed instructions about anything that was went over in this walkthrough.


