

iMaxCamPro (Bronze, Gold, Platinum) How to setup Motion Detection (remotely)
How to setup Motion Detection (remotely)
Bronze, Gold, and Platinum iMaxCamPro DVR's
Back to iMaxCamPro Support | Support Home
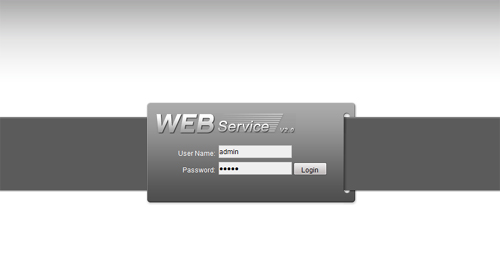
Step 1
Login to your DVR system via WebService using Internet Explorer. To do this, type in your DVR's ip address in the internet explorer address bar. Default administrator login is �admin / admin�.
Step 2
Once logged in, click on the �CONFIG� button from the top menu.

Step 3
From the channel pull-down menu, select the Channel you would like to setup the schedule for. Next, click on "Set" for the day you would like to schedule.

Step 4
You should now see the following screen with settings you will need to change to schedule recording for Sunday (if you click "Set" next to Sunday). After this you will be repeating the same steps for the remaining days of the week.
Now you may schedule recording for Sunday setting the time period(s) of recording and the type ("MD" for Motion Detection). If you would like to record for 24hours continously, then set Period 1 to "00:00 - 24:00." If you would like to set up multiple periods, then set your times accordingly. Afterwords, click "OK" at the bottom.

*To schedule recording for the remaining days, click "Set" next to the day you would like to schedule and repeat the above instructions.
Step 5
After scheduling recording for all days you need, click "Save" at the bottom.

Step 6
Next, click "DETECT" from the left menu.
In the detect menu here, it is very important that we proceed channel by channel, instead of using the �all� channel option, as this can negatively impact our configuration. This guide will begin with settings for channel 1, so make sure you have 1 selected as your channel at the top right.

Step 7
This menu contains all of your event settings. With channel 1 selected, we want to make sure our event type is also set to Motion Detect and that you check the box next to Channel. Adjust your sensitivity as needed (6 being the highest, most sensitive). You can also mask out trouble spots from the image (flags, ceiling fans, etc) by clicking the Select button next to Region. On the region grid, any red tinted grid square is an active detection square, and will trigger motion accordingly. A passive square will have no tint, and should actually display the camera image. Once you�re satisfied with your grid, you can right click or hit escape to return to the previous menu.
Step 8
The bottom portion of this menu contains all of your reactions to the event at the top of this menu. There are quite a few more reactions to motion than just recording, however this guide is only detailing the record channel function. Again, we should have our event channel (at the top) selected as channel 1 still. From here, we want to highlight the checkbox to the left of record channel (enabling the recording response for the event), and also select a channel to record from the right side here (1 should be highlighted by default). Once you�ve got this set, click save at the bottom. If you�re doing additional channels, it is not necessary to click save after every channel � you can simply switch to the next event channel at this point and save at the very end.
*Note that your record channel does not need to match your event channel, but please be aware that you will not record on the event channel by default unless you have it selected from the row of record channels!
Step 9
Repeat steps 7 and 8 for any additional channels.
You should be finished with the detection setup at this point � all that remains is troubleshooting to make sure you�re configuration is working properly.
Bronze, Gold, and Platinum iMaxCamPro DVR's
Back to iMaxCamPro Support | Support Home
Step 1
Login to your DVR system via WebService using Internet Explorer. To do this, type in your DVR's ip address in the internet explorer address bar. Default administrator login is �admin / admin�.
Step 2
Once logged in, click on the �CONFIG� button from the top menu.
Step 3
From the channel pull-down menu, select the Channel you would like to setup the schedule for. Next, click on "Set" for the day you would like to schedule.
Step 4
You should now see the following screen with settings you will need to change to schedule recording for Sunday (if you click "Set" next to Sunday). After this you will be repeating the same steps for the remaining days of the week.
Now you may schedule recording for Sunday setting the time period(s) of recording and the type ("MD" for Motion Detection). If you would like to record for 24hours continously, then set Period 1 to "00:00 - 24:00." If you would like to set up multiple periods, then set your times accordingly. Afterwords, click "OK" at the bottom.
*To schedule recording for the remaining days, click "Set" next to the day you would like to schedule and repeat the above instructions.
Step 5
After scheduling recording for all days you need, click "Save" at the bottom.
Step 6
Next, click "DETECT" from the left menu.
In the detect menu here, it is very important that we proceed channel by channel, instead of using the �all� channel option, as this can negatively impact our configuration. This guide will begin with settings for channel 1, so make sure you have 1 selected as your channel at the top right.
Step 7
This menu contains all of your event settings. With channel 1 selected, we want to make sure our event type is also set to Motion Detect and that you check the box next to Channel. Adjust your sensitivity as needed (6 being the highest, most sensitive). You can also mask out trouble spots from the image (flags, ceiling fans, etc) by clicking the Select button next to Region. On the region grid, any red tinted grid square is an active detection square, and will trigger motion accordingly. A passive square will have no tint, and should actually display the camera image. Once you�re satisfied with your grid, you can right click or hit escape to return to the previous menu.
Step 8
The bottom portion of this menu contains all of your reactions to the event at the top of this menu. There are quite a few more reactions to motion than just recording, however this guide is only detailing the record channel function. Again, we should have our event channel (at the top) selected as channel 1 still. From here, we want to highlight the checkbox to the left of record channel (enabling the recording response for the event), and also select a channel to record from the right side here (1 should be highlighted by default). Once you�ve got this set, click save at the bottom. If you�re doing additional channels, it is not necessary to click save after every channel � you can simply switch to the next event channel at this point and save at the very end.
*Note that your record channel does not need to match your event channel, but please be aware that you will not record on the event channel by default unless you have it selected from the row of record channels!
Step 9
Repeat steps 7 and 8 for any additional channels.
You should be finished with the detection setup at this point � all that remains is troubleshooting to make sure you�re configuration is working properly.


