

How to Add New IP Cameras to GeoVision's MultiCam software
GeoVision
Back to GeoVision Support | Support Home
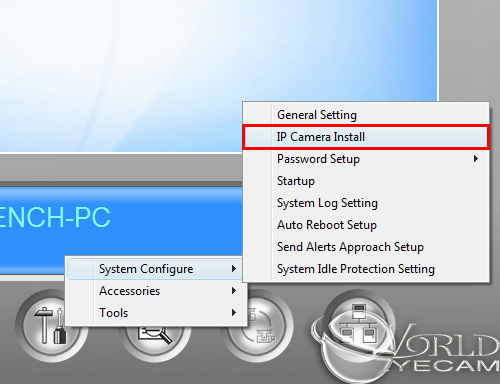
1. Under MultiCam, navigate to Configure -> System Configure -> IP Camera Install.
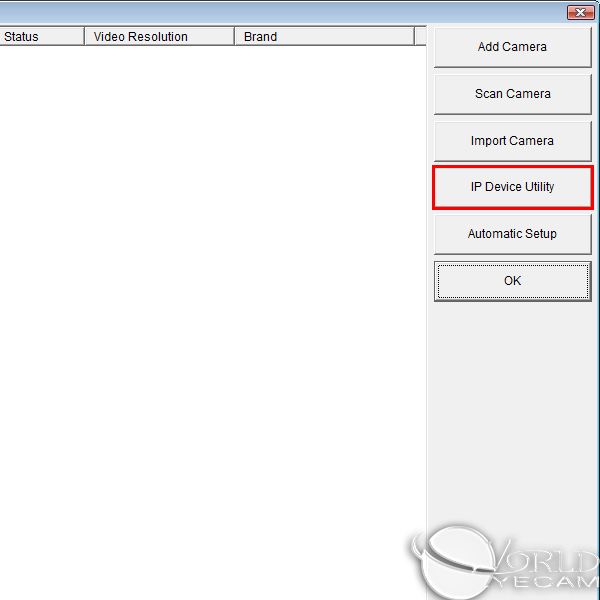
2. Click on the button labeled IP Device Utility to start the IP Device Utility application.
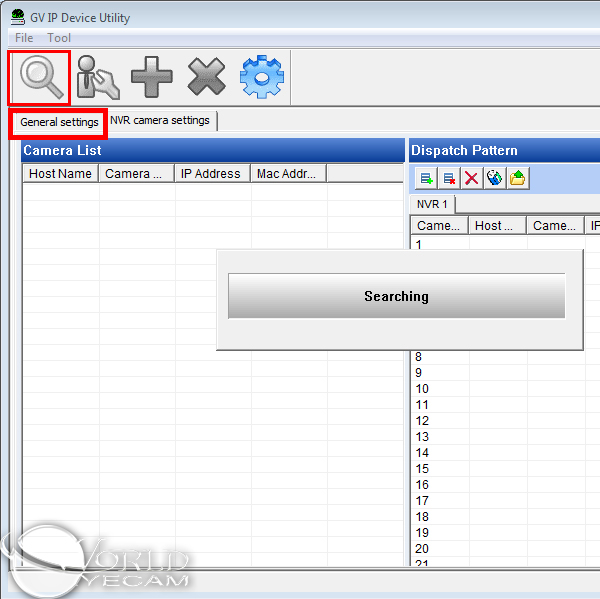
3. Upon launch, the IP Device Utility will start a search for IP cameras on the network. When that is finished, click on the General Settings tab to see a list of recognized IP cameras on your network. If you don't see the proper amount of cameras listed here, make sure all data and/or power cables are securely connected.
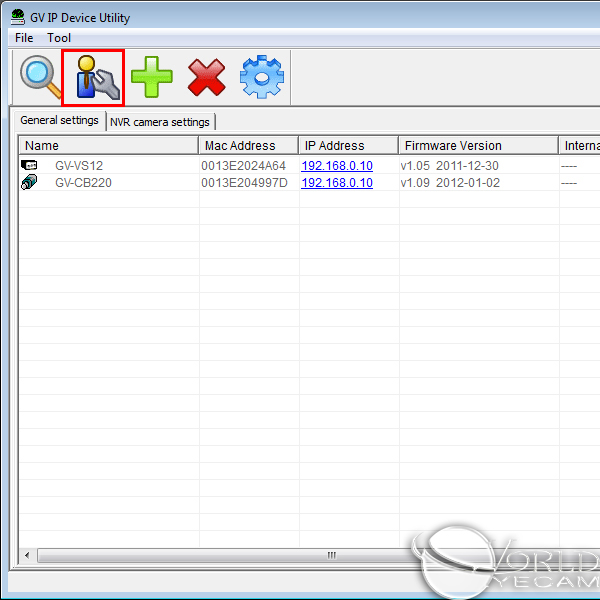
4. Under this tab, you will see the camera models, MAC addresses and firmware versions listed. You can see in the picture below that the cameras found all have the default IP address of 192.168.0.10. We need to change/assign different IP addresses for each camera on the network in order for proper function of the software. The easiest way to do this is to click on the button labeled Auto Set IP Address (highlighted in red). This will automatically assign sequential IP addresses for each of the cameras, based on your current network setup.
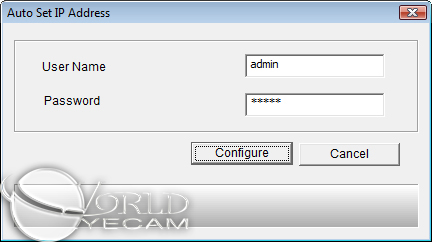
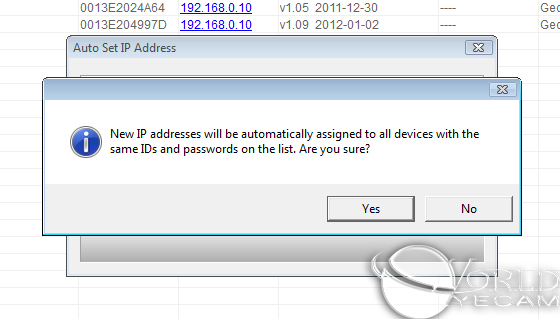
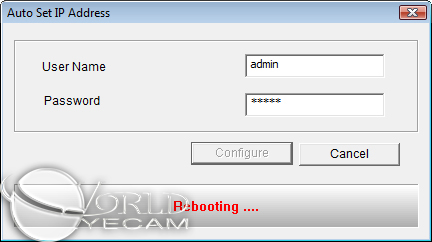
5. After clicking the button, you should see the dialog box asking for User name and password. Use the default username/password of admin/admin. Click Configure and you should then see a dialogue box warning that it will assign IP addresses to all cameras. If you want to continue, press Yes and you should see then see a progress bar detailing what is happening.
6. If successful, you should see listed the same IP cameras, but with new sequential IP addresses. If not, repeat steps 4 and 5. After reviewing this window, close the window to return back to the IP Camera Install window.

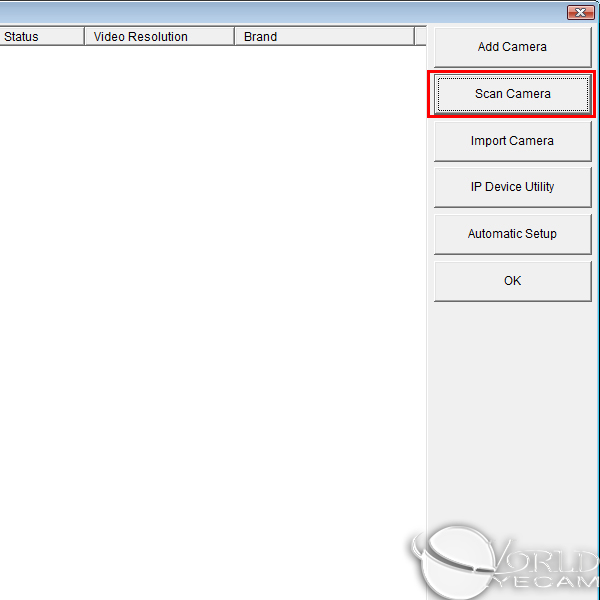
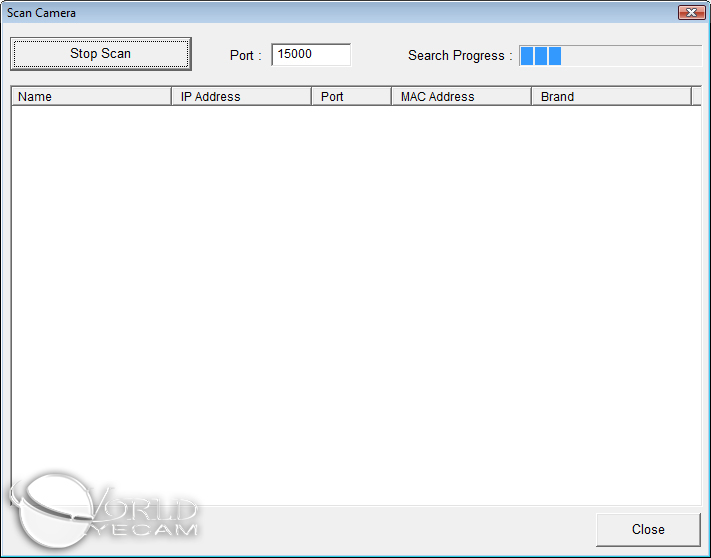
7. From the IP Camera Install window, click on Scan Camera to open the utility to scan for cameras to add. In the new window that opens, start the scan by clicking on the button labeled Start Scan. You should then see a progress bar for the scanning process.
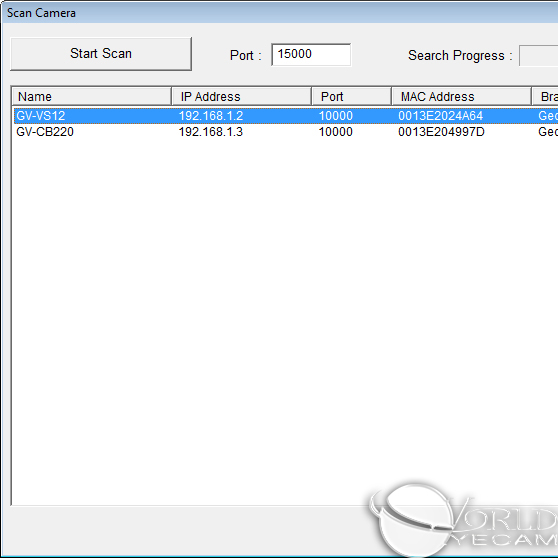
8. To add each camera listed in the window, you must double-click on the name of the camera to enter in a query mode where the program will ask the camera what resolution it supports.
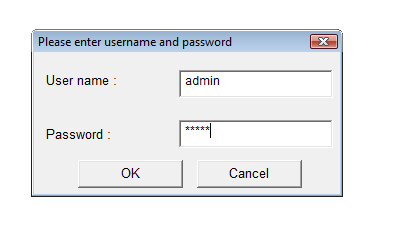
9. Enter in the default user name and password (admin/admin) for the camera.
10. Within this window, the camera is automatically queried for available resolutions. As you can see in the window below, it has been detected under Codec Type and automatically filled in. Click Apply to add the camera into the main IP Camera Install window. Repeat steps 8-10 for each camera. Close the Scan Camera window when finished with all cameras.

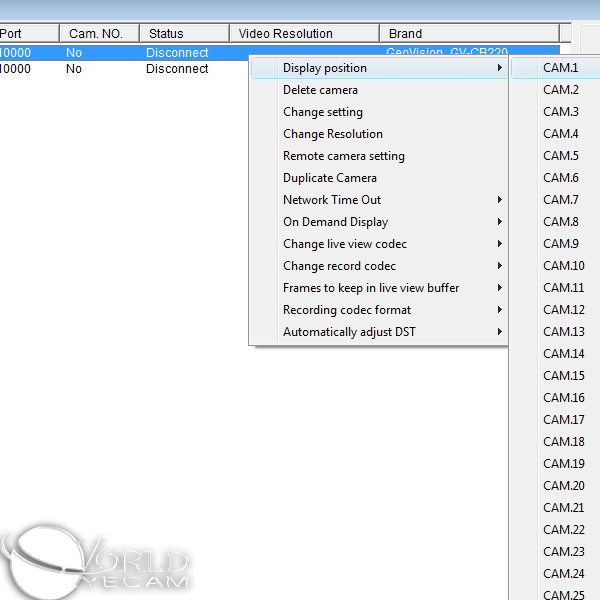
11. Back in the main IP Camera Install window is the last step. For each camera, you can right click on the name of the camera and a menu should appear. From within this menu, you must choose the position/window you want the IP camera assigned to. It will be under the Display Position menu choice. Repeat this for each camera and when finished, click on OK and your IP cameras should be properly installed.
Back to GeoVision Support | Support Home
1. Under MultiCam, navigate to Configure -> System Configure -> IP Camera Install.
2. Click on the button labeled IP Device Utility to start the IP Device Utility application.
3. Upon launch, the IP Device Utility will start a search for IP cameras on the network. When that is finished, click on the General Settings tab to see a list of recognized IP cameras on your network. If you don't see the proper amount of cameras listed here, make sure all data and/or power cables are securely connected.
4. Under this tab, you will see the camera models, MAC addresses and firmware versions listed. You can see in the picture below that the cameras found all have the default IP address of 192.168.0.10. We need to change/assign different IP addresses for each camera on the network in order for proper function of the software. The easiest way to do this is to click on the button labeled Auto Set IP Address (highlighted in red). This will automatically assign sequential IP addresses for each of the cameras, based on your current network setup.
5. After clicking the button, you should see the dialog box asking for User name and password. Use the default username/password of admin/admin. Click Configure and you should then see a dialogue box warning that it will assign IP addresses to all cameras. If you want to continue, press Yes and you should see then see a progress bar detailing what is happening.
6. If successful, you should see listed the same IP cameras, but with new sequential IP addresses. If not, repeat steps 4 and 5. After reviewing this window, close the window to return back to the IP Camera Install window.
7. From the IP Camera Install window, click on Scan Camera to open the utility to scan for cameras to add. In the new window that opens, start the scan by clicking on the button labeled Start Scan. You should then see a progress bar for the scanning process.
8. To add each camera listed in the window, you must double-click on the name of the camera to enter in a query mode where the program will ask the camera what resolution it supports.
9. Enter in the default user name and password (admin/admin) for the camera.
10. Within this window, the camera is automatically queried for available resolutions. As you can see in the window below, it has been detected under Codec Type and automatically filled in. Click Apply to add the camera into the main IP Camera Install window. Repeat steps 8-10 for each camera. Close the Scan Camera window when finished with all cameras.
11. Back in the main IP Camera Install window is the last step. For each camera, you can right click on the name of the camera and a menu should appear. From within this menu, you must choose the position/window you want the IP camera assigned to. It will be under the Display Position menu choice. Repeat this for each camera and when finished, click on OK and your IP cameras should be properly installed.


