

GeoVision MultiCam Webcam Server Setup
Multicam Webcam Server Setup
for GeoVision
Back to GeoVision Support | Support Home
Applicable MultiCam versions: v8.0 and above
1. In the GeoVision MultiCam software, click on Network button.
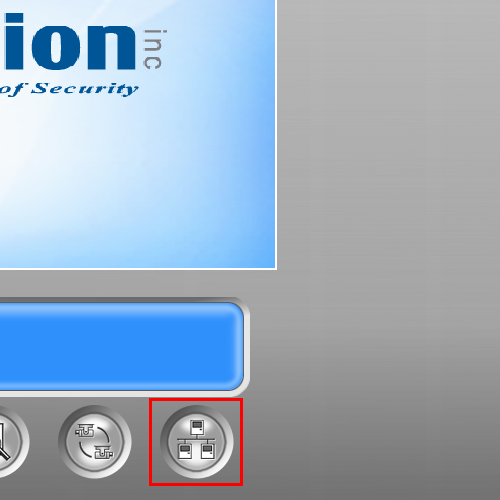
2. Select Webcam Server to bring up Server Setup window

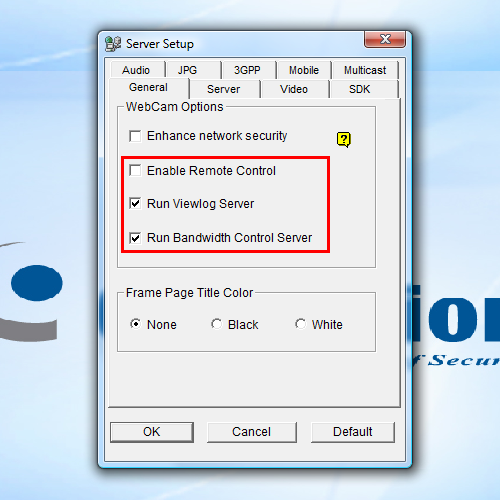
3. Under General tab, Enable Remote Control and Run Viewlog server options are checked by default. If not,
-Select Enable Remote Control if Control Center software is used to control this DVR.
-Select Run Viewlog server to allow Remote Viewlog connection
-For v8.2 and newer, Select Run Bandwidth Control Server to allow bandwidth control.
 4. Under the Server tab, select �Run GeoHTTP Server�. Make sure to write down HTTP Port, Command Port and Data Port values. (By default the ports are 80, 4550, and 5550 respectively)
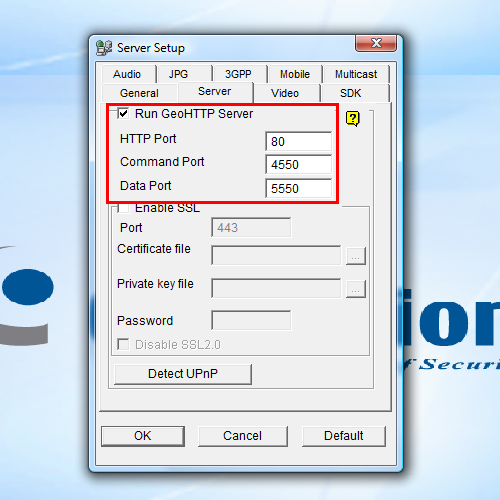 If you are wanting to monitor audio as well, click on the Audio tab and make sure both boxes are checked.
 5. Click on �OK� to exit Server Setup and enable the Webcam Server.
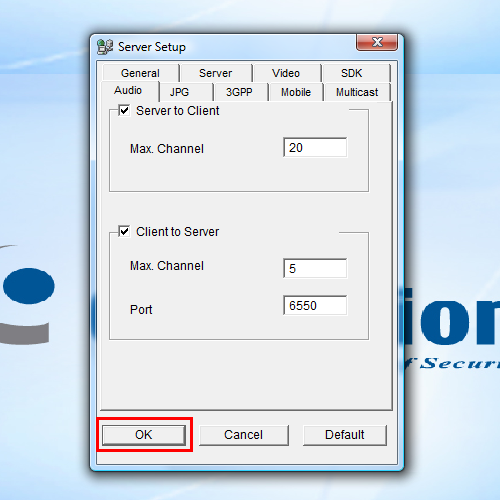 6. After Webcam Server is activated, a Web and CCS sign should appear in the blue box on the right.
 At this moment, you should be able to access Webcam on your LAN. You may also confirm that you have set up the above steps correctly by entering in "http://127.0.0.1"(localhost/loopback) in the address bar under Internet Explorer on your DVR. If you chose an HTTP port other than port 80, you will need to add ":XXXX" to the address. (Where XXXX is the new HTTP port number). If you have configured things correctly, you should be able to see a Webcam Login page as shown below, otherwise you will need to verify the above settings again.
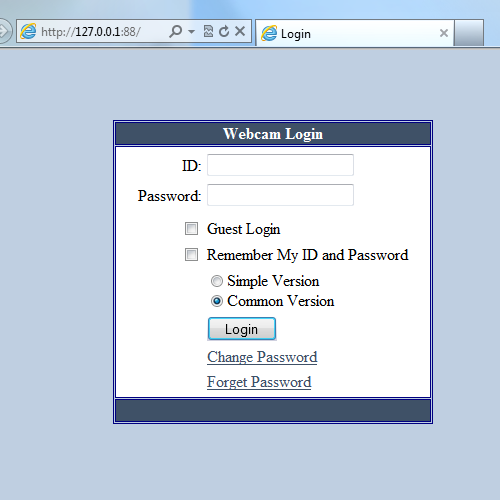 Network Port Configuration
Locate local IP address for DVR and router
7. To locate the local IP address for DVR and router, perform the following steps on the DVR:
- For Windows Vista�: Click Start, then type in �cmd� in the search box
- For Windows XP�: Click Start, then Run, and type in �cmd� in the search box
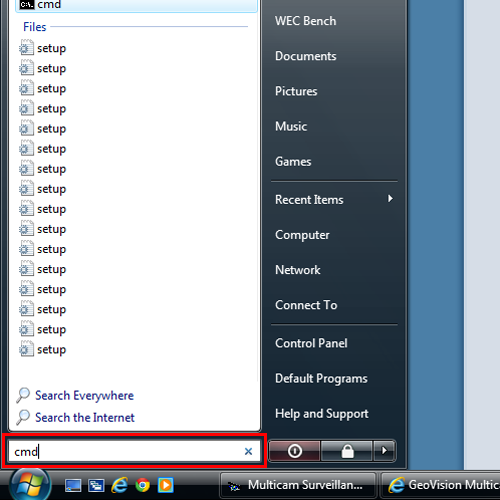 8. In the DOS command prompt, type in "ipconfig" and then press the Enter key.
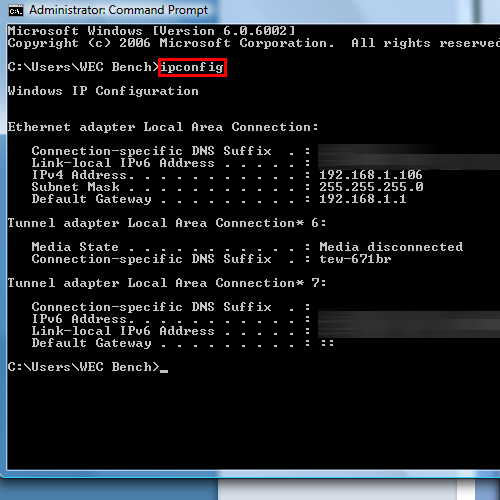 9. Locate DVR local IP address: for the example below, DVR's local IP is 192.168.1.106
Locate router local IP address: for the example below, router's local IP is 192.168.1.1
9. Locate DVR local IP address: for the example below, DVR's local IP is 192.168.1.106
Locate router local IP address: for the example below, router's local IP is 192.168.1.1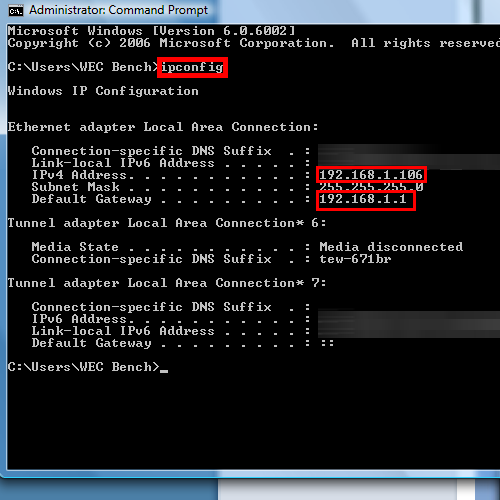 -The DVR local IP address is necessary for users to view Webcam on LAN and for port forwarding in the next section
-The router local IP address is necessary to login to the router for port forwarding in the following stepAccess Router and Port Forwarding
-The DVR local IP address is necessary for users to view Webcam on LAN and for port forwarding in the next section
-The router local IP address is necessary to login to the router for port forwarding in the following stepAccess Router and Port Forwarding
10. Enter router's local IP address from Step 9. From the example above, the router's local IP address is 192.168.1.1 11. Access the router with the default user name and password provided by the router manufacturer.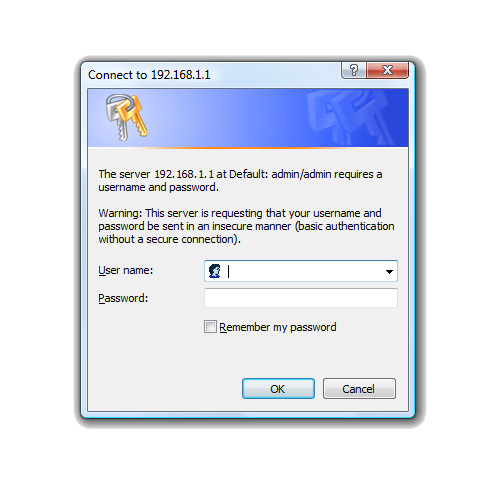 If you do not know your username and password for the router, contact your network administrator or check with your router manufacturer to see if there is any default username and password (i.e. admin)
12.) Once logged into the router, open up another Internet Explorer browser and go to http://www.portforward.com.
If you do not know your username and password for the router, contact your network administrator or check with your router manufacturer to see if there is any default username and password (i.e. admin)
12.) Once logged into the router, open up another Internet Explorer browser and go to http://www.portforward.com.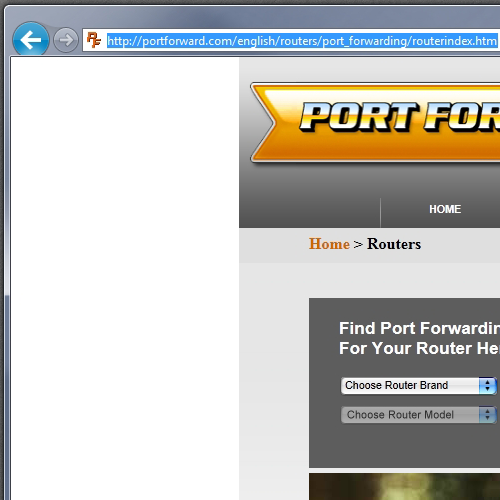 13. In the router index, scroll down the page and select the brand and model of the router you are currently using.
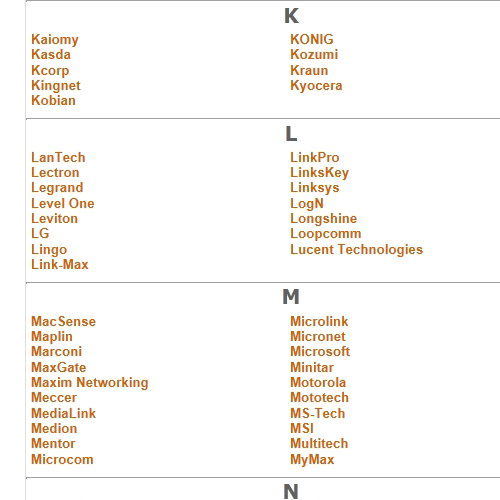 14. After the router is selected, the second page will prompt you for a software application which you want to port forward for. In this case, scroll to 'G' section and select GeoVision Webcam as the application.
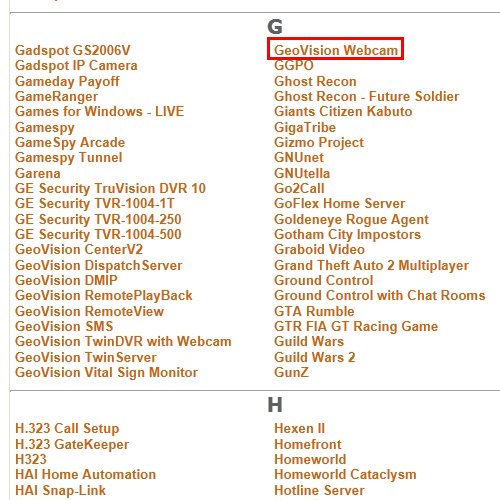 15. The next page will lead you to step by step instruction for port forwarding on your router. Enter the last segment of DVR local IP address as found in Step 9 above.
 16. Follow the instructions as indicated on the webpage. Please note that for basic remote viewing, only three ports are required as indicated in step 4
-To verify whether you have port forwarded your ports correctly, go to www.canyouseeme.org in Internet Explorer.
-Using its Open Port Check Tool, type in each of the port you have forwarded from the previous steps to check the result. Enter in each port number in the box next to What Port?. Then click on the button labeled "Check Your Port" Repeat the same process for each port you have opened.
- For each port that is open and port forwarded correctly, you should see a green Success message.
- For each port that is NOT open and port forwarded correctly, you will see a red Failed message.
If you see a Failed message for any of the ports, you will need to restart from step 10 and try to forward that port again.If you are unable to perform port forwarding, or if you have questions or difficulties getting the ports to be opened, please contact your router manufacturer or Internet Service Provider directly as they should be able to assist you on the process.
Repeat the same process for each port you have opened.
- For each port that is open and port forwarded correctly, you should see a green Success message.
- For each port that is NOT open and port forwarded correctly, you will see a red Failed message.
If you see a Failed message for any of the ports, you will need to restart from step 10 and try to forward that port again.If you are unable to perform port forwarding, or if you have questions or difficulties getting the ports to be opened, please contact your router manufacturer or Internet Service Provider directly as they should be able to assist you on the process. Access from the Internet
17. To check your external IP address, go to websites such as www.whatismyip.com or www.canyouseeme.org in Internet Explorer on the DVR. - You will need your external IP address when attempting to connect from a PC outside the network. 18. Once ports are forwarded correctly, on any remote PC open Internet Explorer and type in the external IP address of the DVR from step 17. Then enter ID and Password and click on the button labeled Login.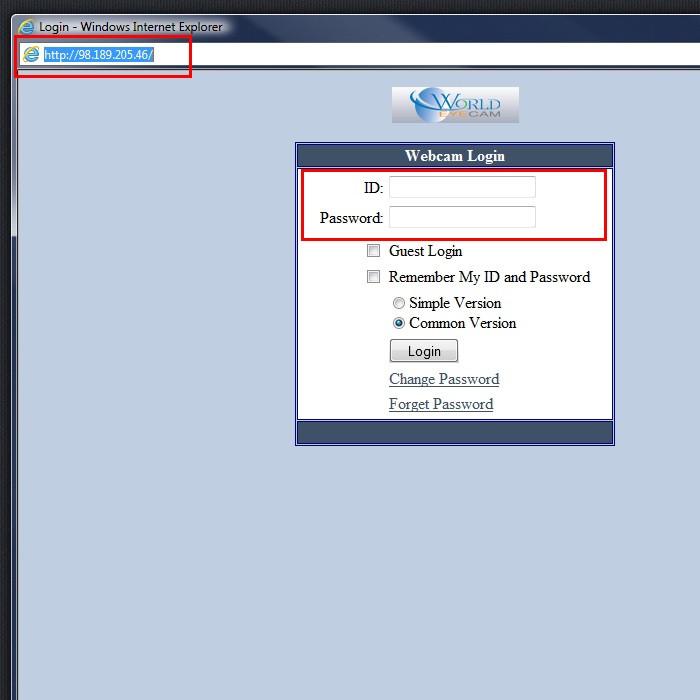 The ID and Password are the same as the ones used on the DVR locally.
19. Install all ActiveX controls necessary if prompted by the Internet Explorer browser, then you should be able to view your DVR cameras online.
The ID and Password are the same as the ones used on the DVR locally.
19. Install all ActiveX controls necessary if prompted by the Internet Explorer browser, then you should be able to view your DVR cameras online.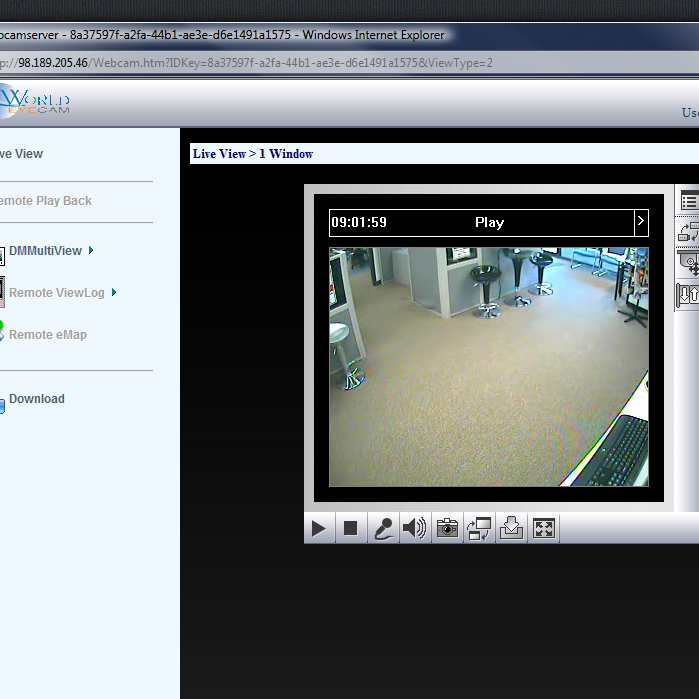
for GeoVision
Back to GeoVision Support | Support Home
Applicable MultiCam versions: v8.0 and above
1. In the GeoVision MultiCam software, click on Network button.
2. Select Webcam Server to bring up Server Setup window
3. Under General tab, Enable Remote Control and Run Viewlog server options are checked by default. If not,
-Select Enable Remote Control if Control Center software is used to control this DVR.
-Select Run Viewlog server to allow Remote Viewlog connection
-For v8.2 and newer, Select Run Bandwidth Control Server to allow bandwidth control.
4. Under the Server tab, select �Run GeoHTTP Server�. Make sure to write down HTTP Port, Command Port and Data Port values. (By default the ports are 80, 4550, and 5550 respectively)
If you are wanting to monitor audio as well, click on the Audio tab and make sure both boxes are checked.
5. Click on �OK� to exit Server Setup and enable the Webcam Server.
6. After Webcam Server is activated, a Web and CCS sign should appear in the blue box on the right.
At this moment, you should be able to access Webcam on your LAN. You may also confirm that you have set up the above steps correctly by entering in "http://127.0.0.1"(localhost/loopback) in the address bar under Internet Explorer on your DVR. If you chose an HTTP port other than port 80, you will need to add ":XXXX" to the address. (Where XXXX is the new HTTP port number). If you have configured things correctly, you should be able to see a Webcam Login page as shown below, otherwise you will need to verify the above settings again.Network Port ConfigurationLocate local IP address for DVR and router
7. To locate the local IP address for DVR and router, perform the following steps on the DVR:
- For Windows Vista�: Click Start, then type in �cmd� in the search box
- For Windows XP�: Click Start, then Run, and type in �cmd� in the search box
8. In the DOS command prompt, type in "ipconfig" and then press the Enter key.
9. Locate DVR local IP address: for the example below, DVR's local IP is 192.168.1.106
Locate router local IP address: for the example below, router's local IP is 192.168.1.1
-The DVR local IP address is necessary for users to view Webcam on LAN and for port forwarding in the next section
-The router local IP address is necessary to login to the router for port forwarding in the following stepAccess Router and Port Forwarding10. Enter router's local IP address from Step 9. From the example above, the router's local IP address is 192.168.1.1 11. Access the router with the default user name and password provided by the router manufacturer.
If you do not know your username and password for the router, contact your network administrator or check with your router manufacturer to see if there is any default username and password (i.e. admin)
12.) Once logged into the router, open up another Internet Explorer browser and go to http://www.portforward.com.
13. In the router index, scroll down the page and select the brand and model of the router you are currently using.
14. After the router is selected, the second page will prompt you for a software application which you want to port forward for. In this case, scroll to 'G' section and select GeoVision Webcam as the application.
15. The next page will lead you to step by step instruction for port forwarding on your router. Enter the last segment of DVR local IP address as found in Step 9 above.
16. Follow the instructions as indicated on the webpage. Please note that for basic remote viewing, only three ports are required as indicated in step 4-To verify whether you have port forwarded your ports correctly, go to www.canyouseeme.org in Internet Explorer.
-Using its Open Port Check Tool, type in each of the port you have forwarded from the previous steps to check the result. Enter in each port number in the box next to What Port?. Then click on the button labeled "Check Your Port"
Repeat the same process for each port you have opened.
- For each port that is open and port forwarded correctly, you should see a green Success message.
- For each port that is NOT open and port forwarded correctly, you will see a red Failed message.
If you see a Failed message for any of the ports, you will need to restart from step 10 and try to forward that port again.If you are unable to perform port forwarding, or if you have questions or difficulties getting the ports to be opened, please contact your router manufacturer or Internet Service Provider directly as they should be able to assist you on the process.Access from the Internet17. To check your external IP address, go to websites such as www.whatismyip.com or www.canyouseeme.org in Internet Explorer on the DVR. - You will need your external IP address when attempting to connect from a PC outside the network. 18. Once ports are forwarded correctly, on any remote PC open Internet Explorer and type in the external IP address of the DVR from step 17. Then enter ID and Password and click on the button labeled Login.
The ID and Password are the same as the ones used on the DVR locally.
19. Install all ActiveX controls necessary if prompted by the Internet Explorer browser, then you should be able to view your DVR cameras online.

