Using iDMSS on iPhone or iPad to View iMaxCamPro Recorders
General Introduction:
How to install and use the mobile phone monitor software based on iPhone or iPad.
Features
This software has the following features:- Use mobile iPhone or iPad to view real-time or recorded video
- Supports PTZ control operation
- Supports simulteneous viewing of up to 4, 9 or 16 channels at a time.
- Controllable audio on all channels, depending on your DRV/DVR specifications
- Redesigned the playback interface according to iPad resolution, including the vertical screen and the horizontal screen
- Added an iPad horizontal/vertical screen control menu, and an iPhone horizontal/vertical screen control menu
- Support figure gesture to control PTZ cameras
- One version for both the iPad and iPhone Supports snapshot function and device list display
- Supports live video and recorded video playback
- Create and save a list of favorite cameras for quick access
Prerequisites:
- An iPhone or iPad with iOS 8.0 or later.
- A working iMaxCamPro Recorder which is powered on, connected to the Internet and has P2P enabled.
- Administrative access to the menus of your iMaxCamPro Recorder to view the device serial number and P2P settings.
- The username and password of any account on the system to view cameras remotely.
Software Installation
Install and configuration instructions are the same for both iPhone and iPad devices.
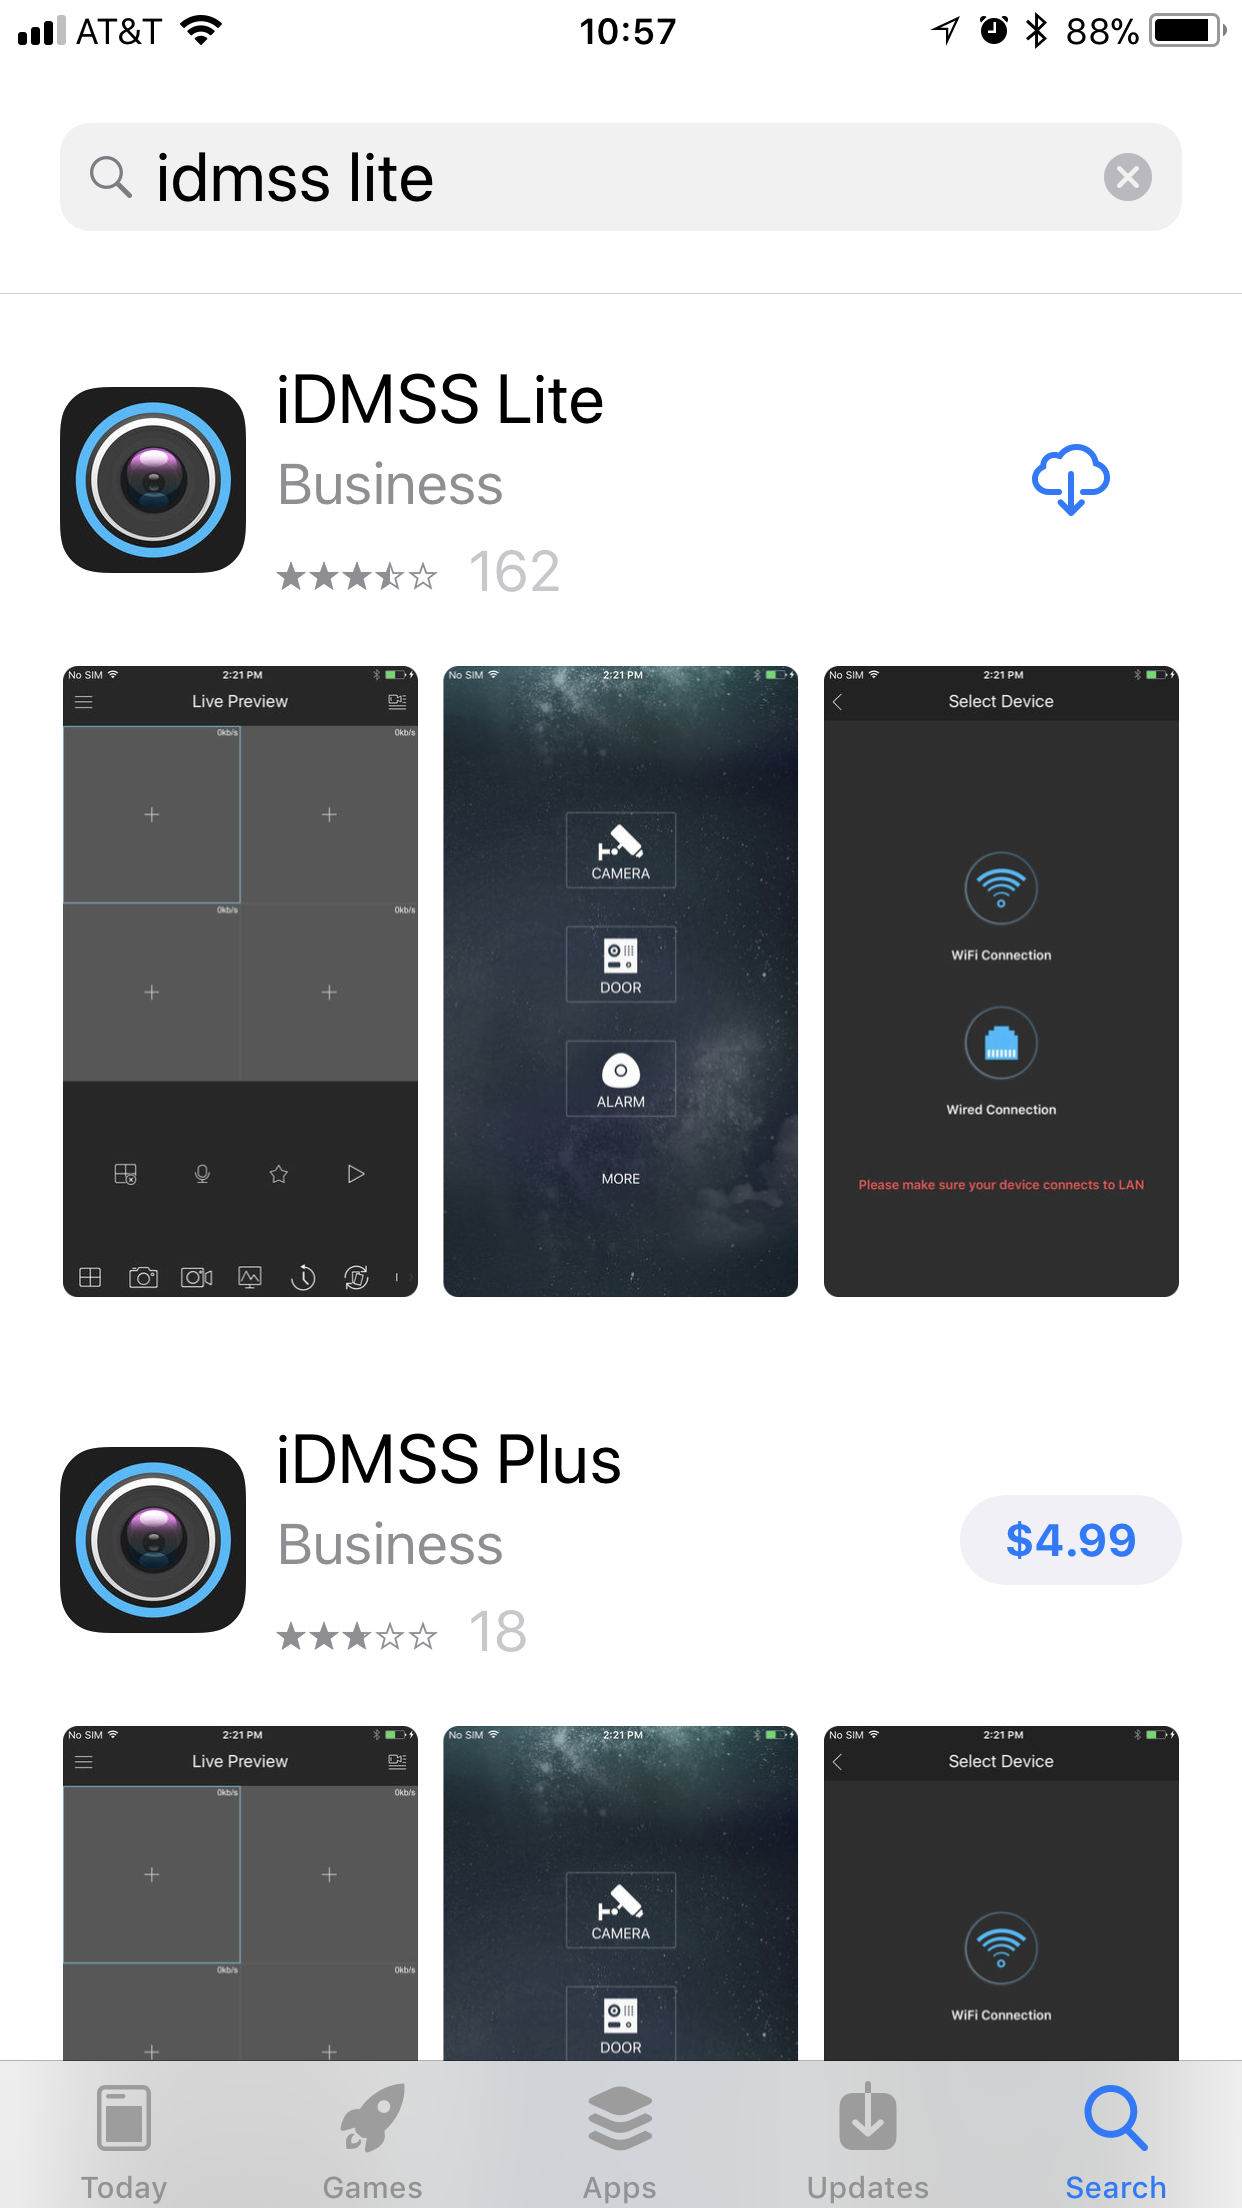
iPhone Download: https://itunes.apple.com/us/app/idmss-lite/id517936193?mt=8
iPad iDMSS HD Download:https://itunes.apple.com/us/app/idmss-hd/id496176795?mt=8
Go to the app store on your device and search for iDMSS Lite. Click GET to install the app.

Find the iDMSS icon on your iPhone to start the program.
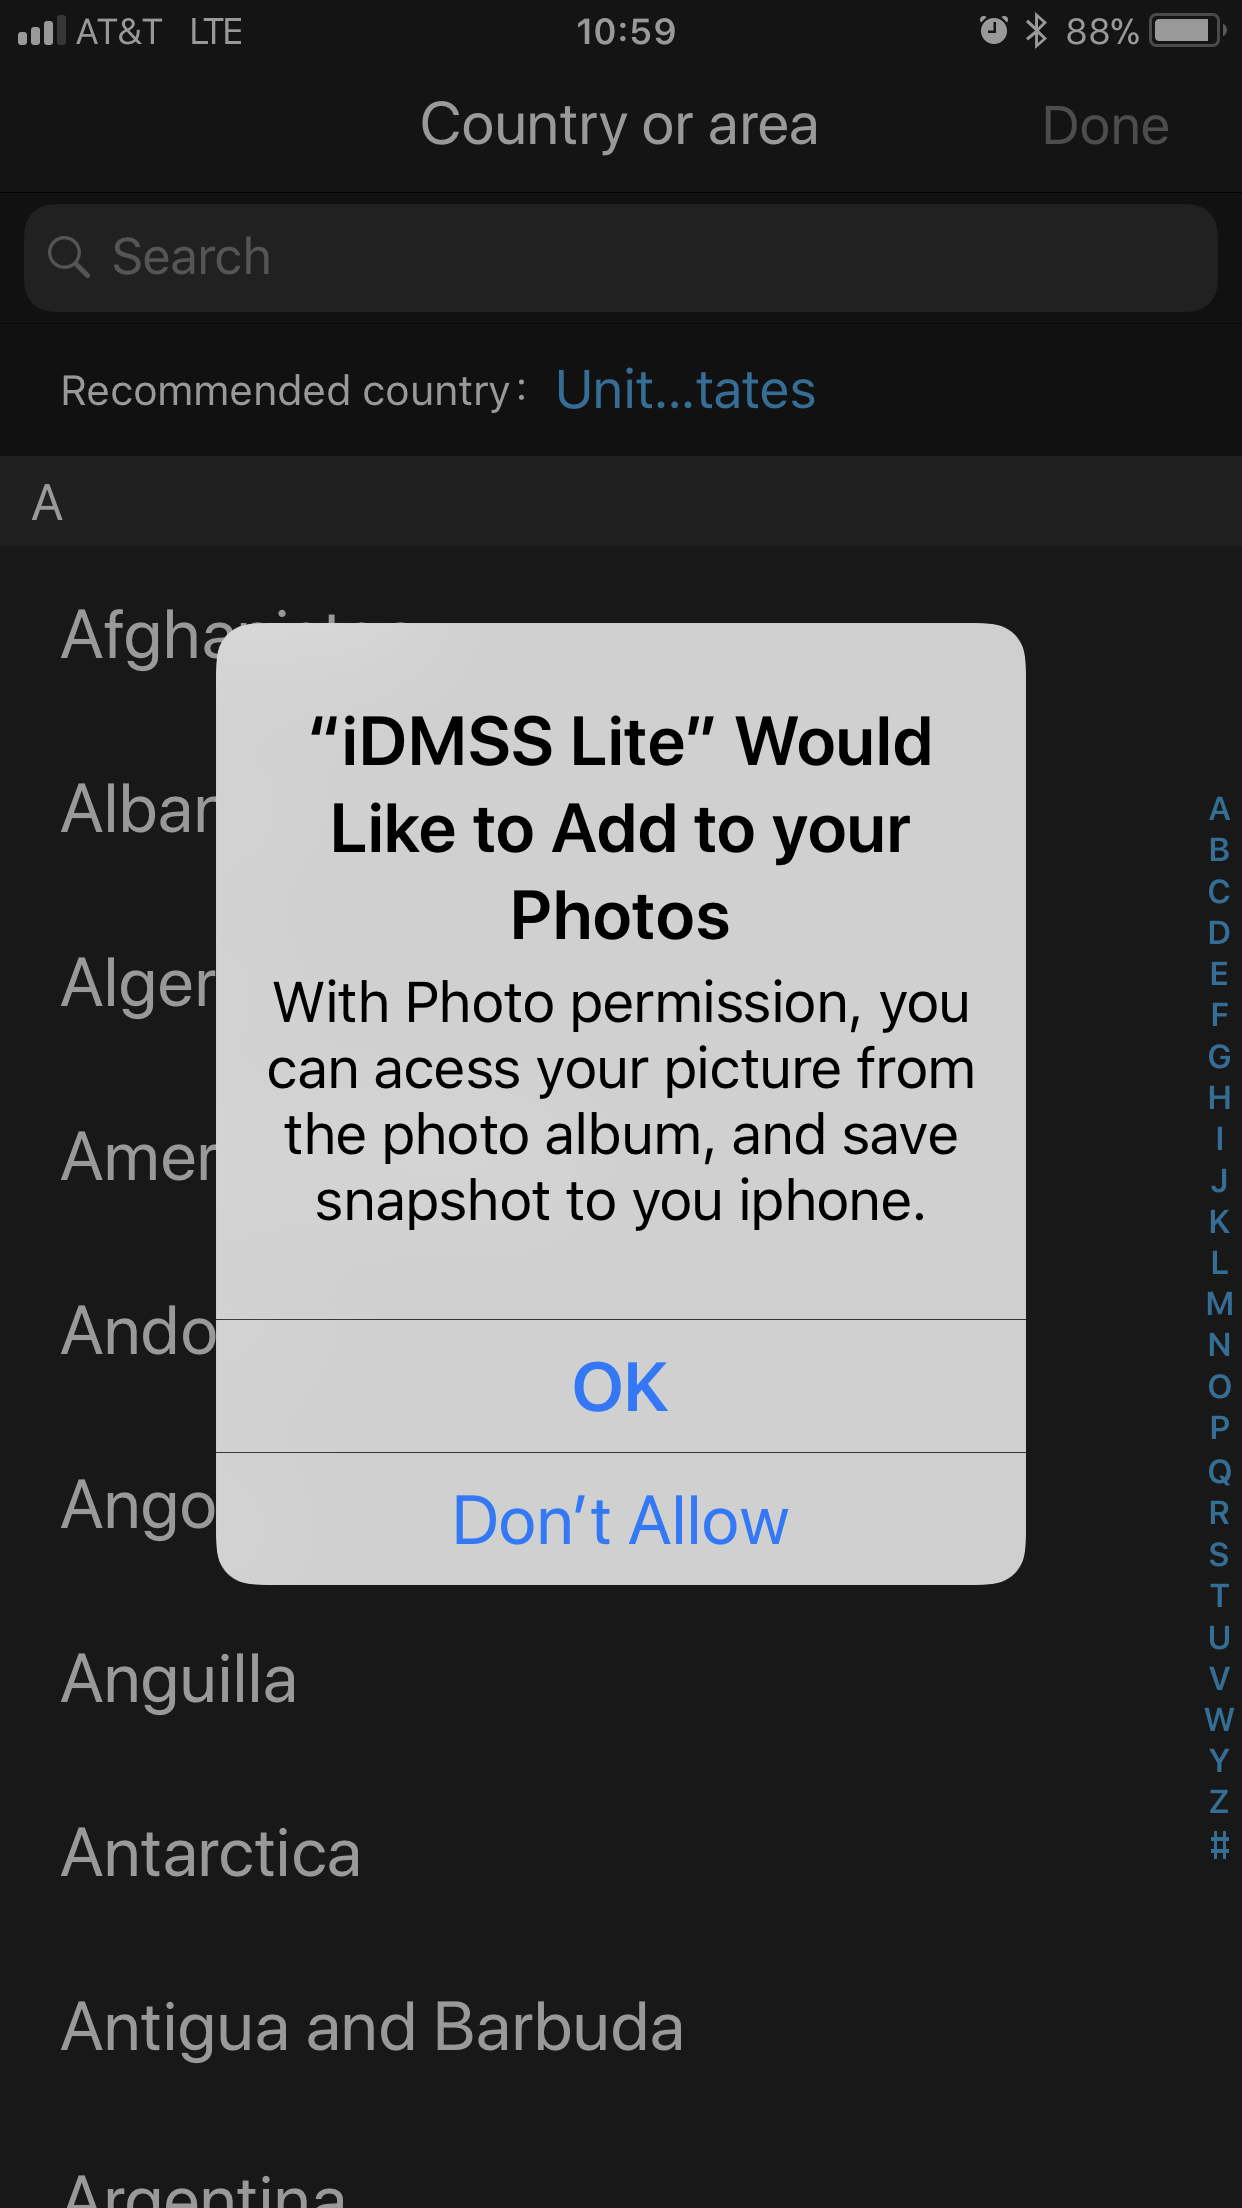
When the app first starts, it will ask for permission to save photos to our device. Click "OK".
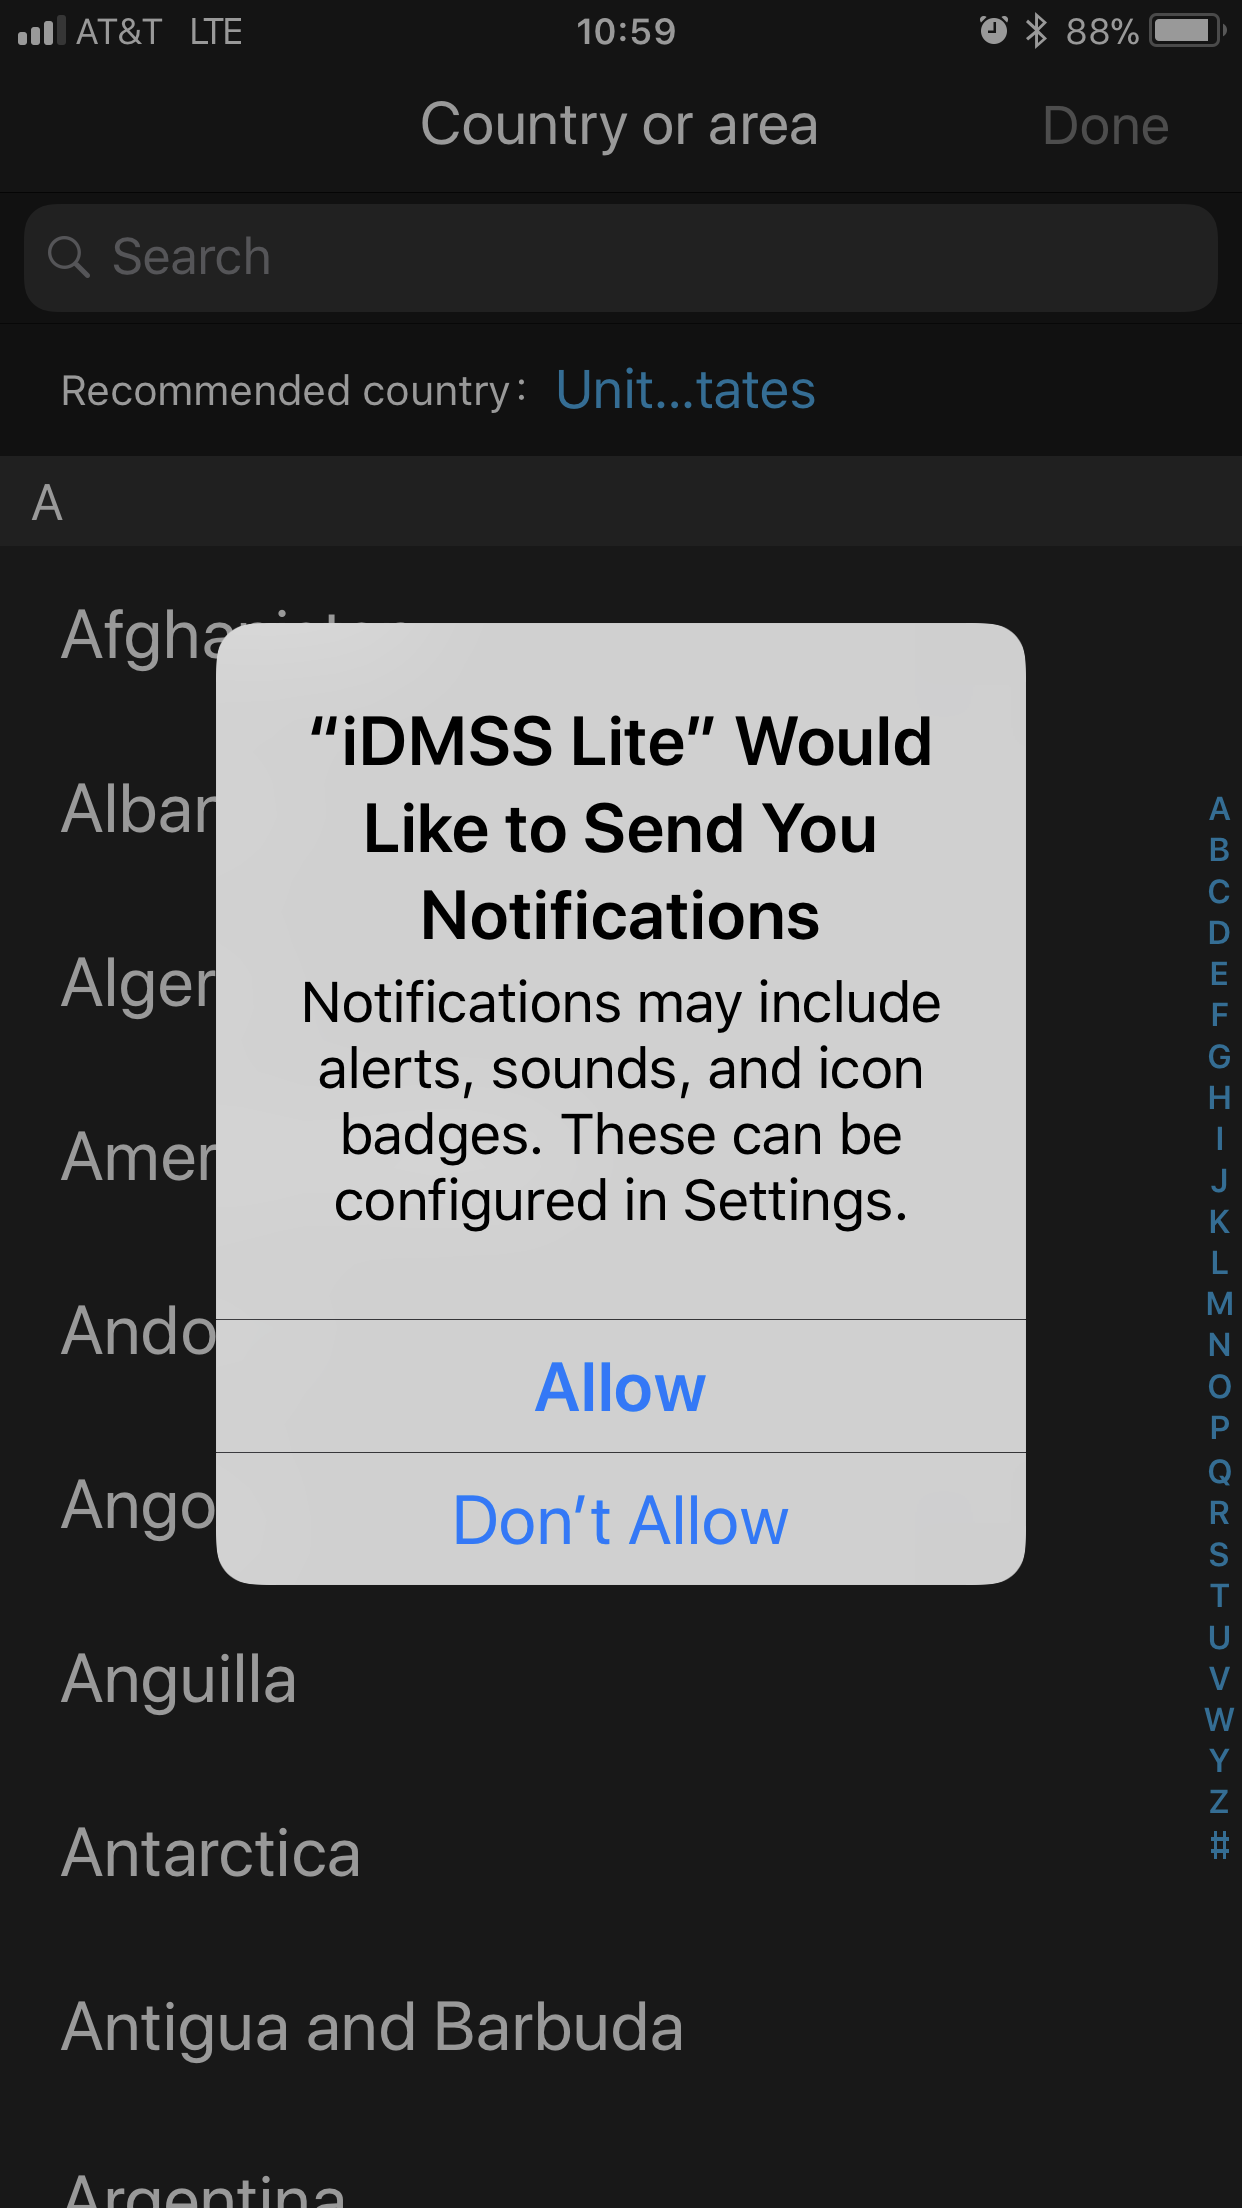
The next prompt is optional. Click "Allow" to enable the application to send you notifications.
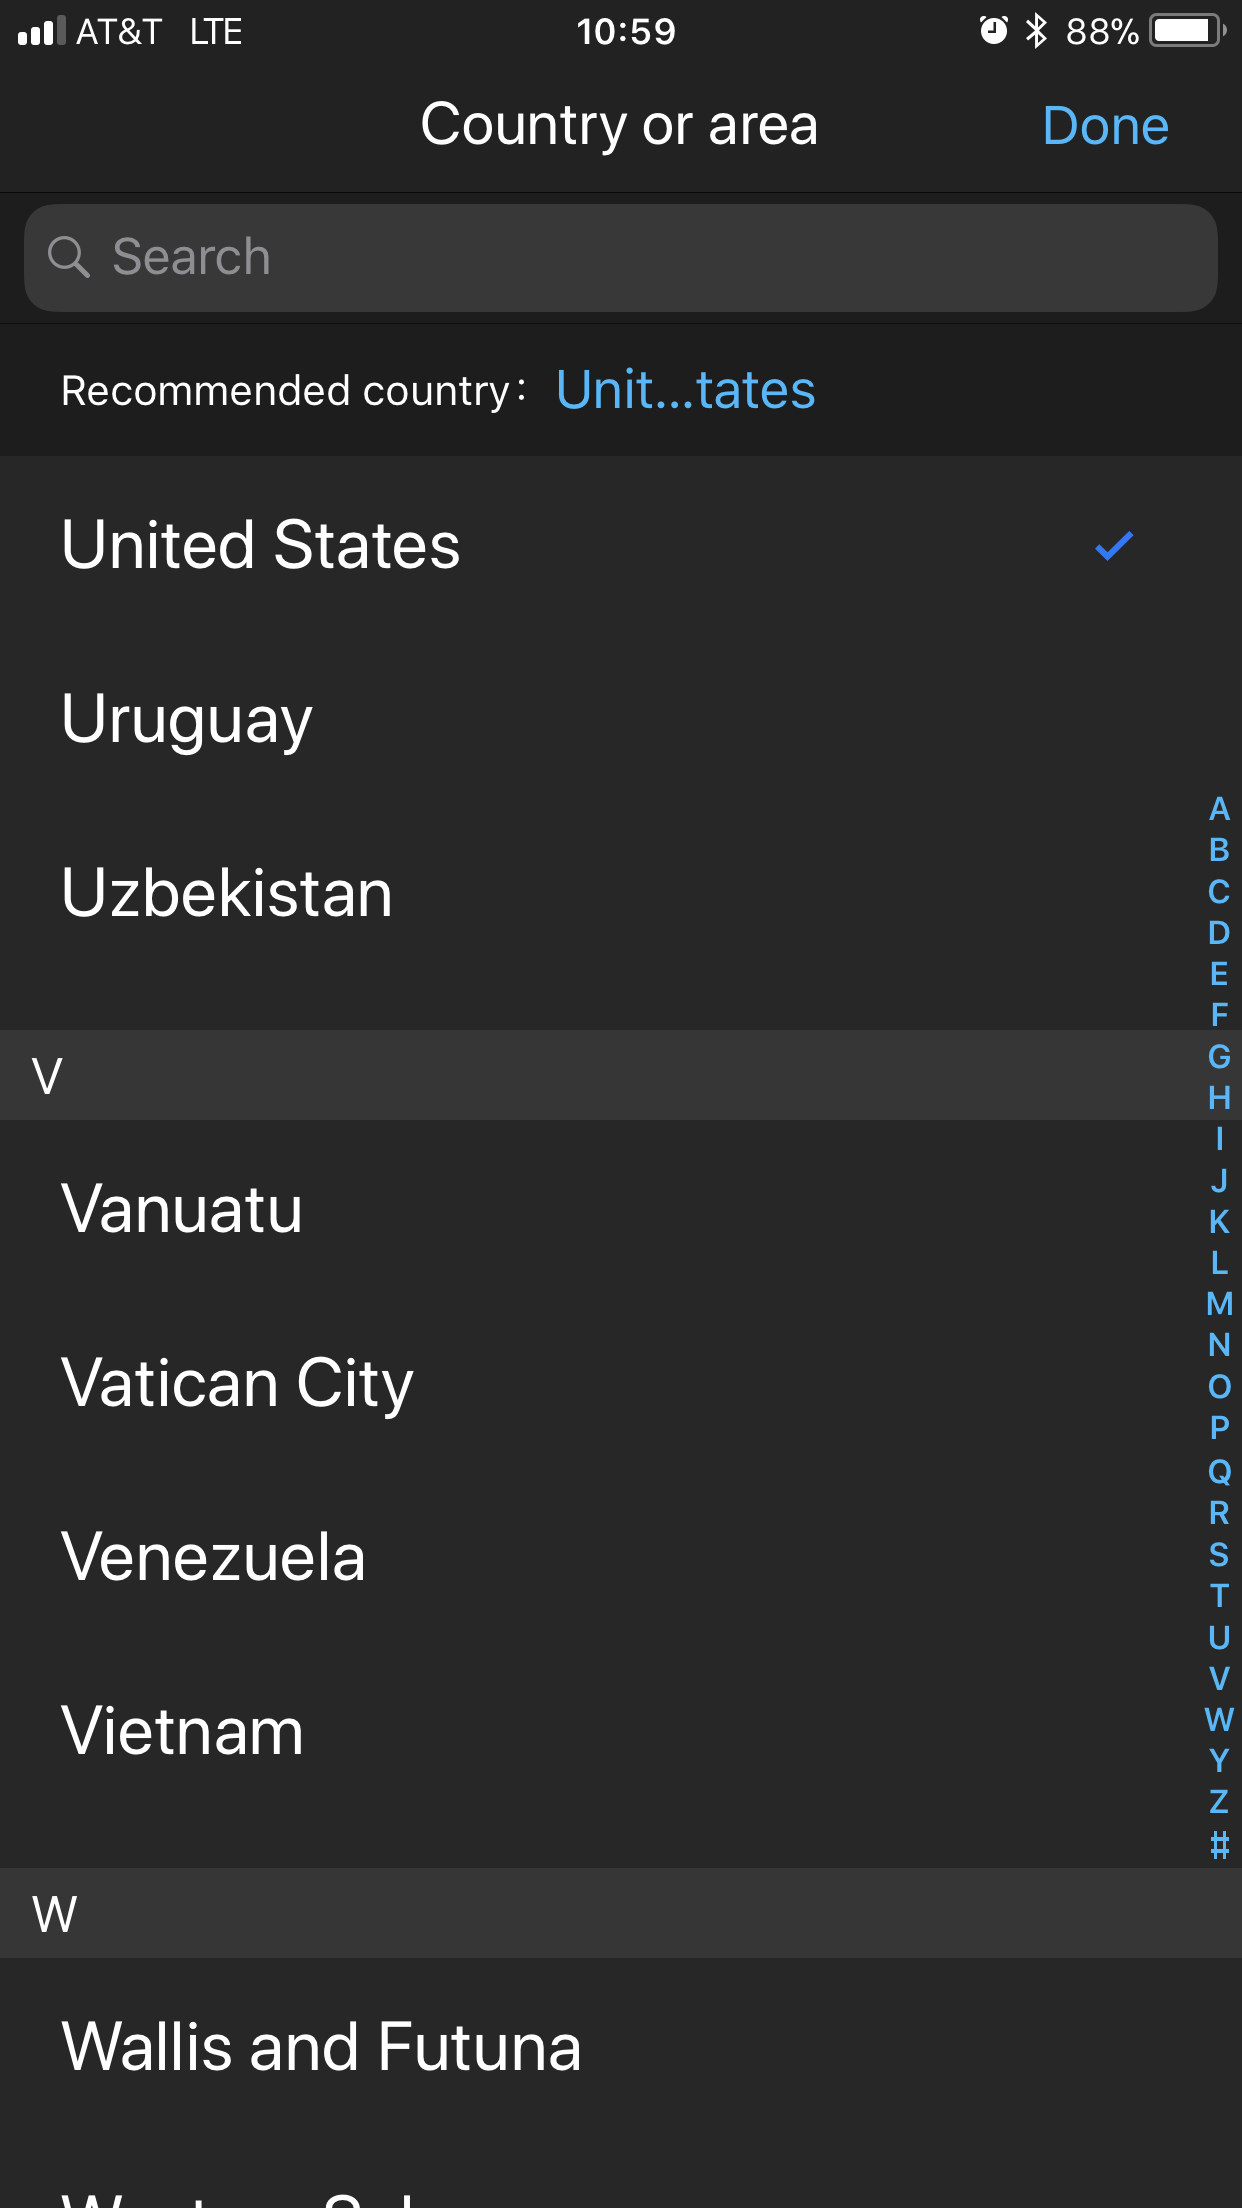
Next, select your Country or area.
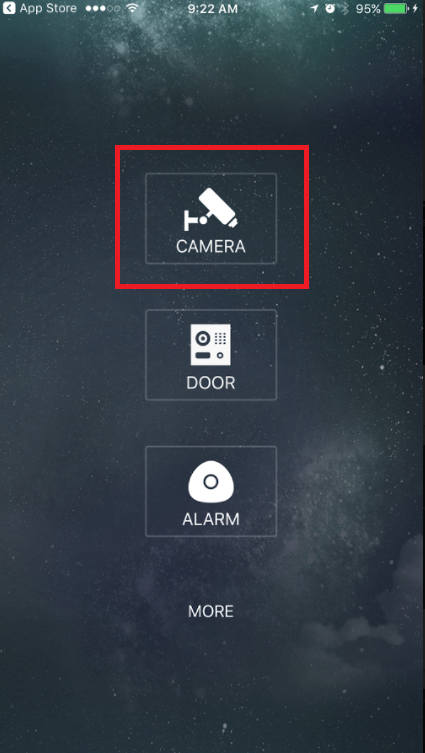
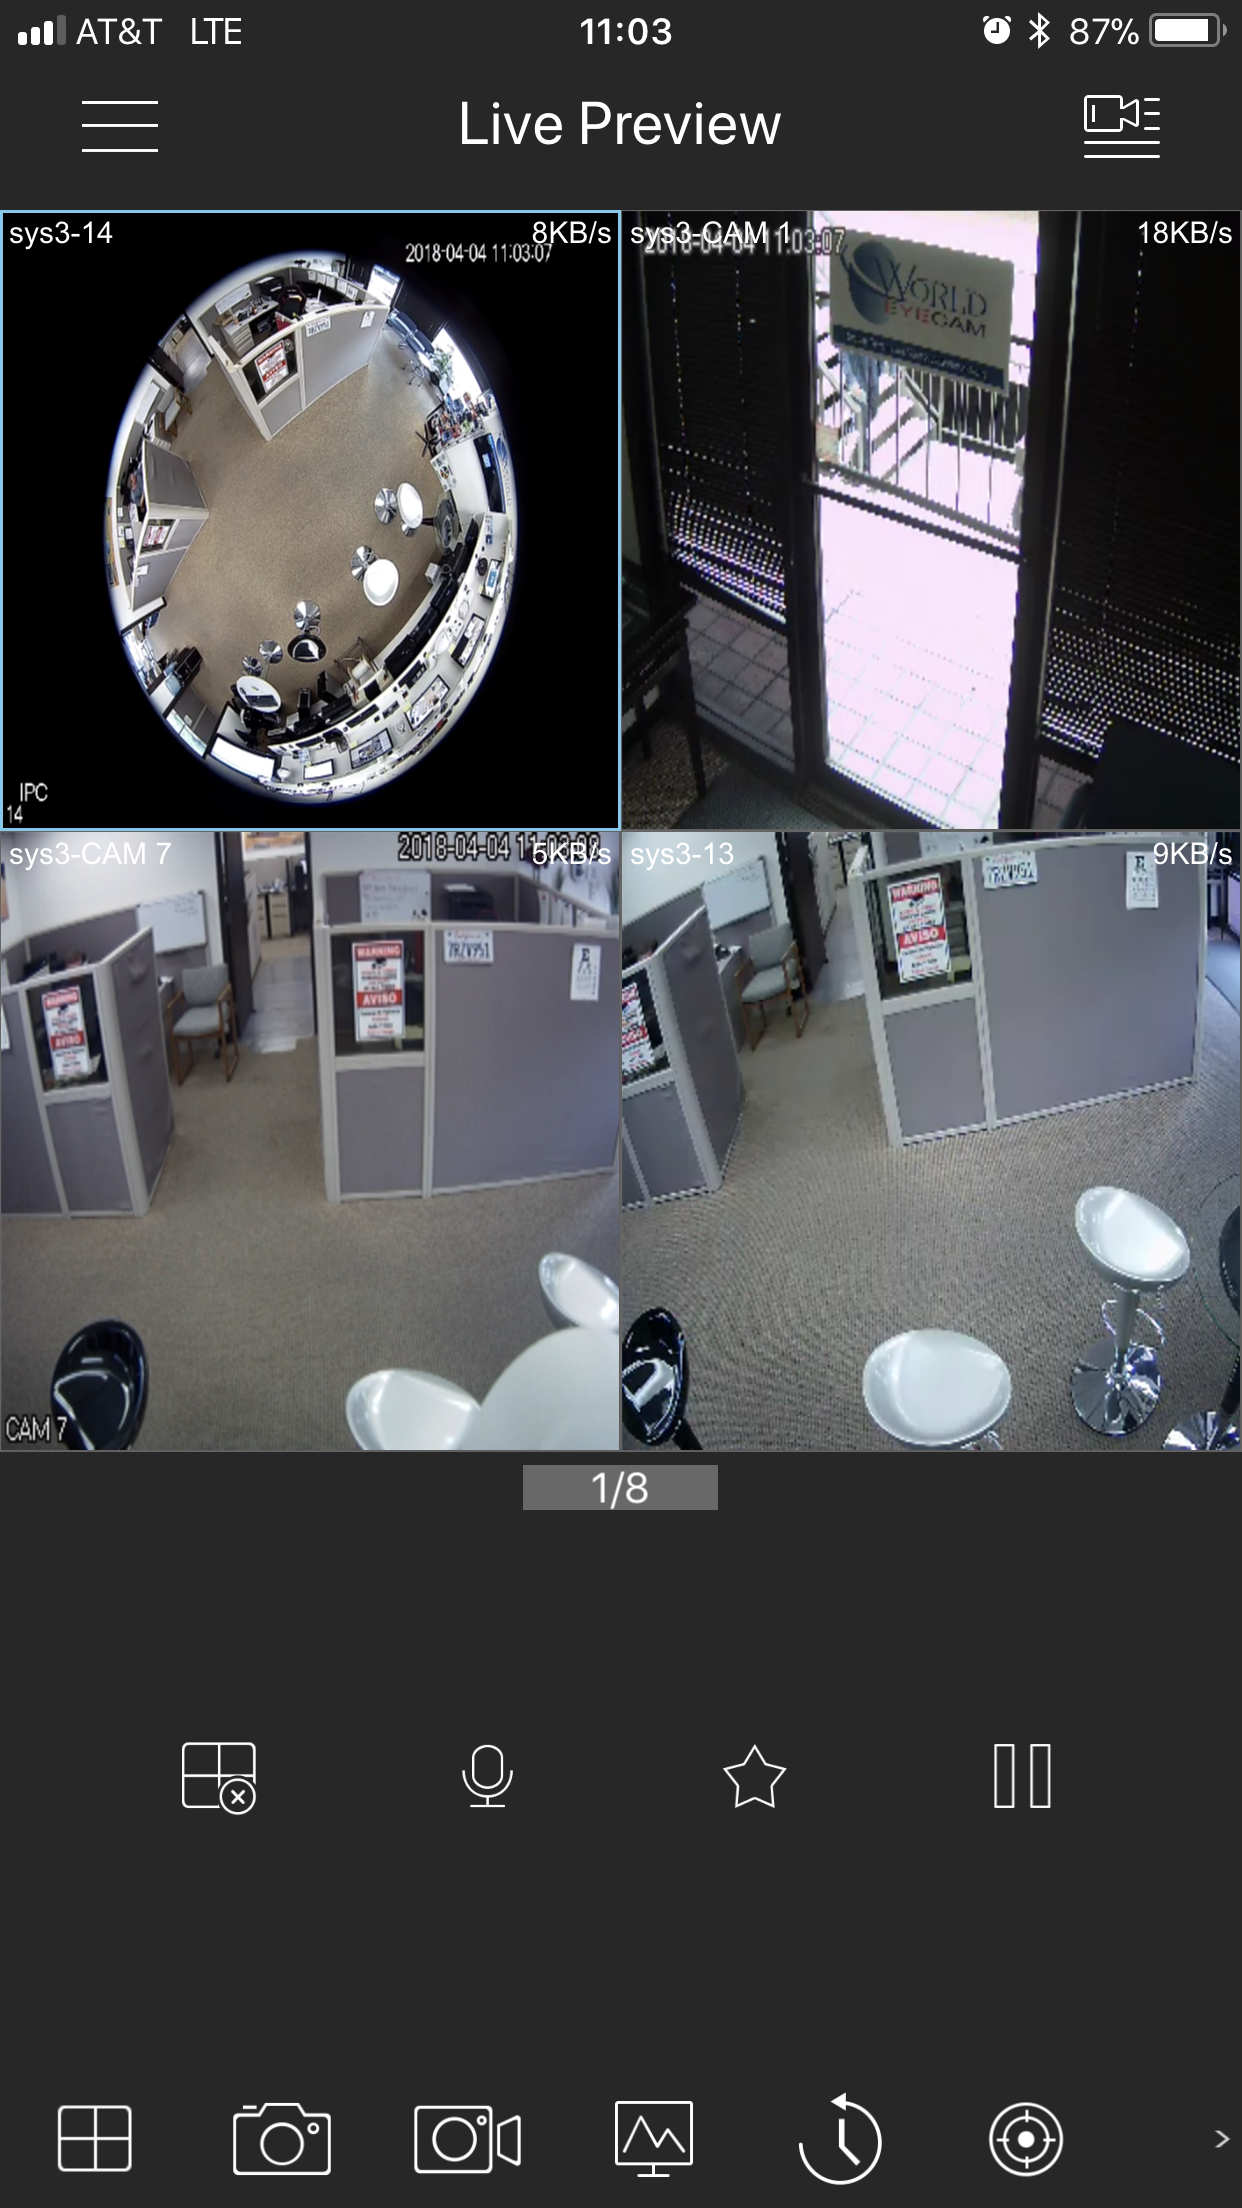
You will now see the main menu. Click "Camera".
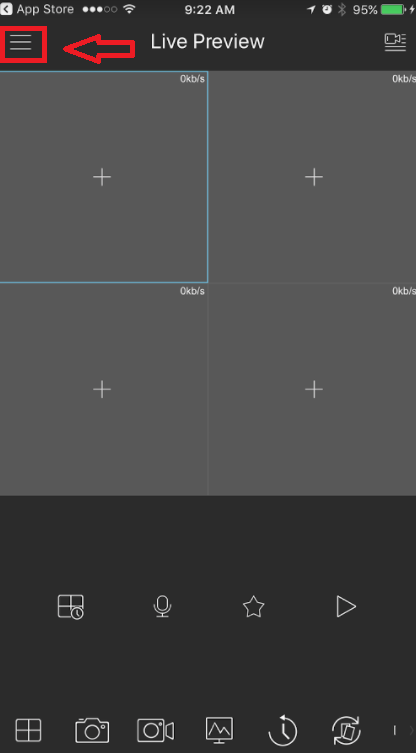
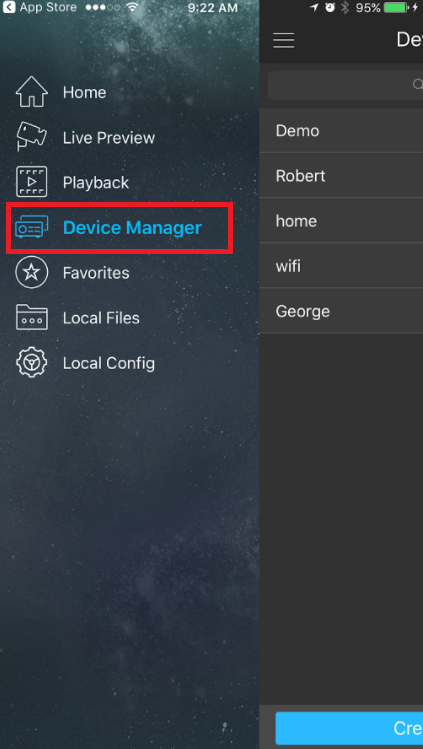
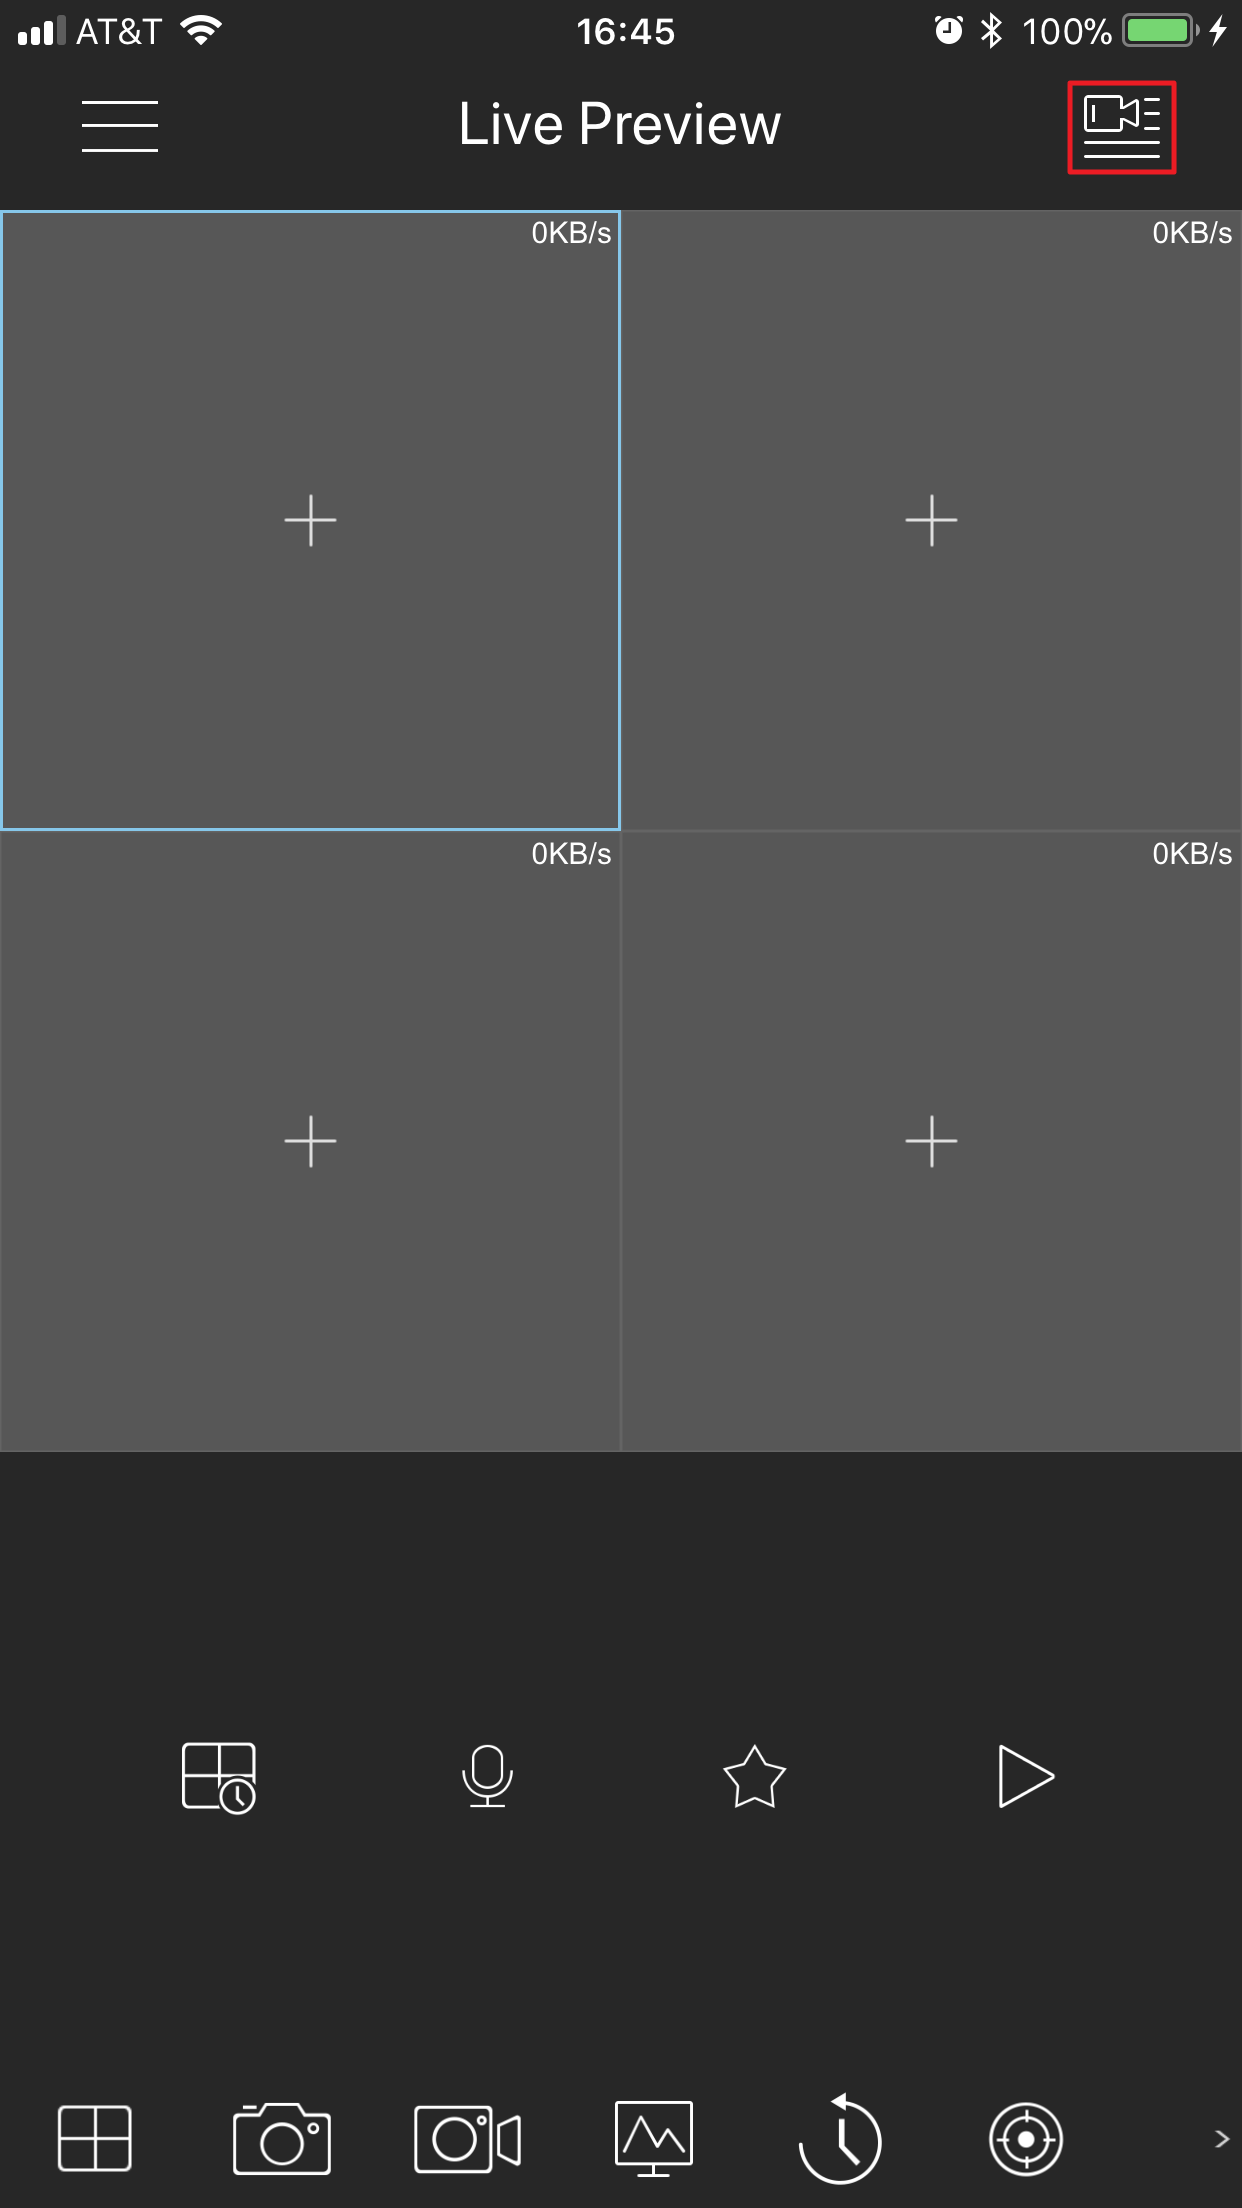
You will now see the Live Preview area of the app. Click the three lines near the top left of the screen.
Next, click "Device Manager".
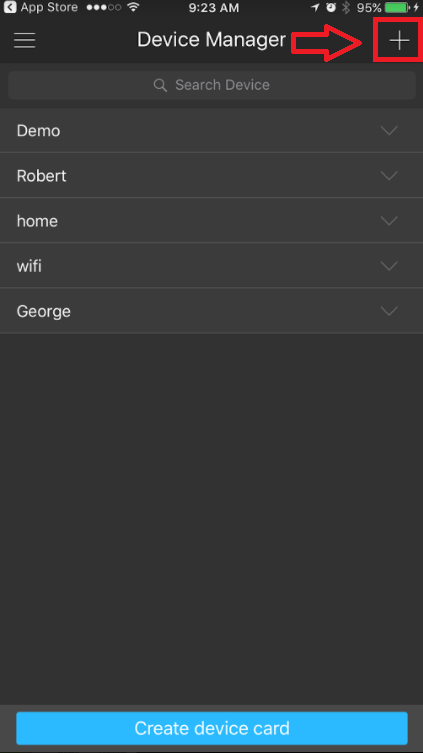
On the top right of the screen, click the (+) symbol.
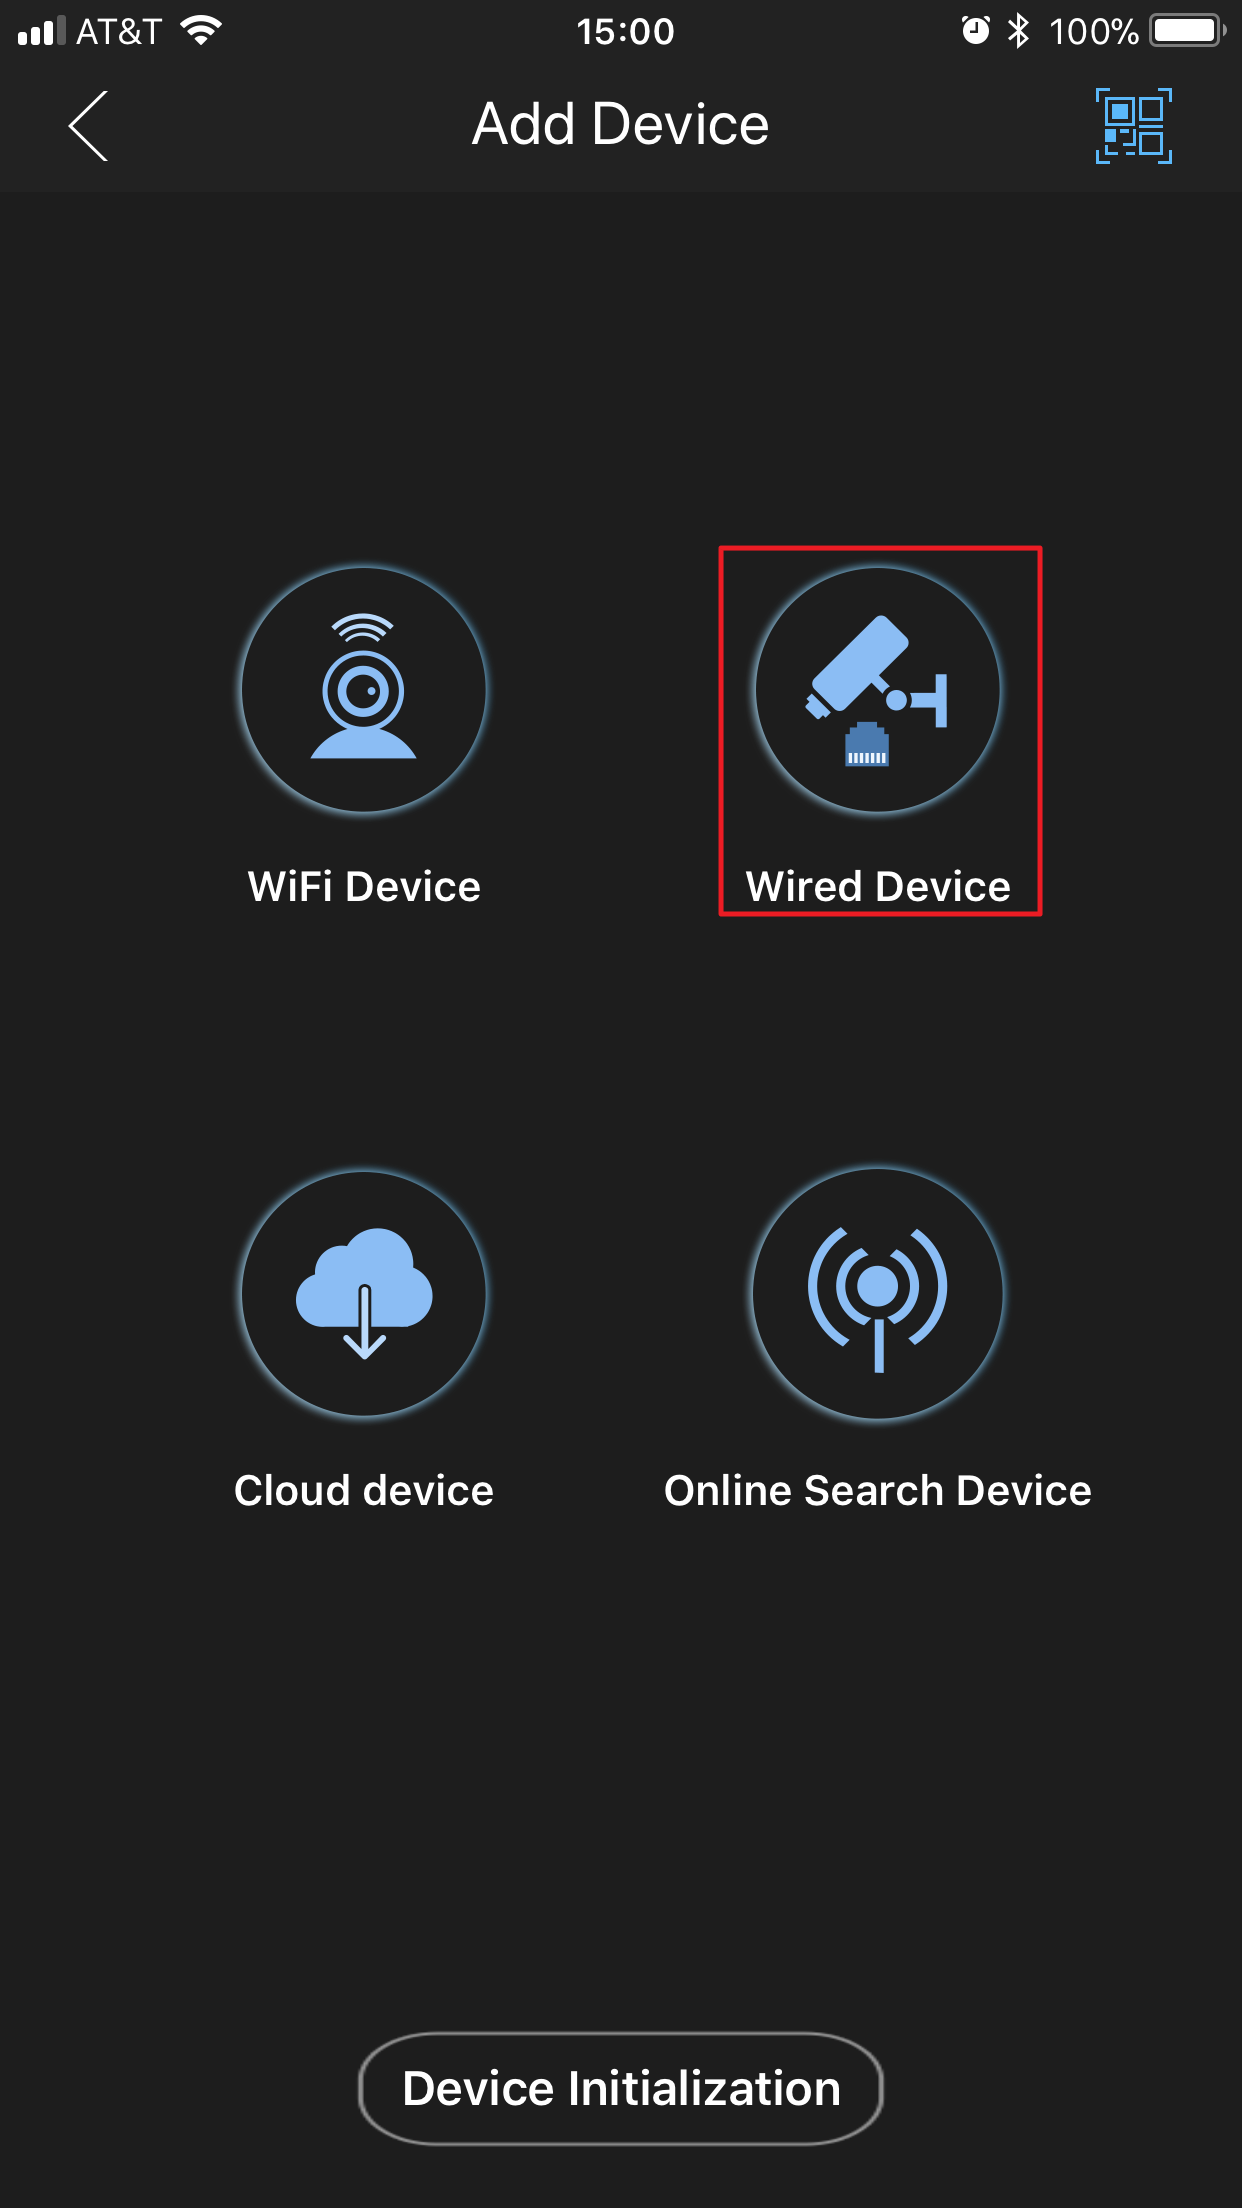
The app will remind you to make sure that your device is initialized, which means powered on and connected to the Internet with P2P enabled.
Click "OK" if you are sure that the device is ready for a connection.

Click "Wired Device".
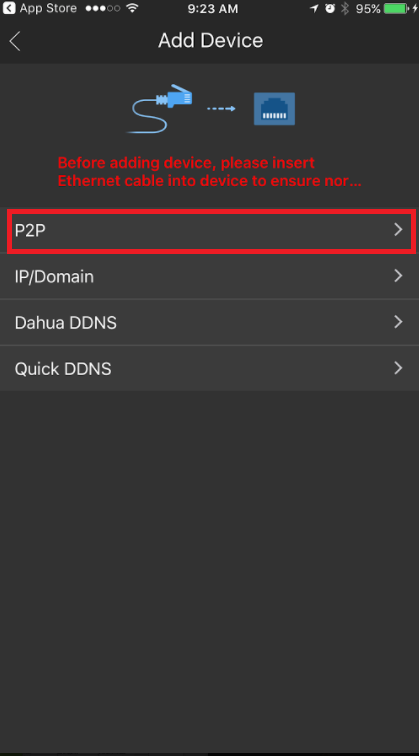
Then click "P2P".
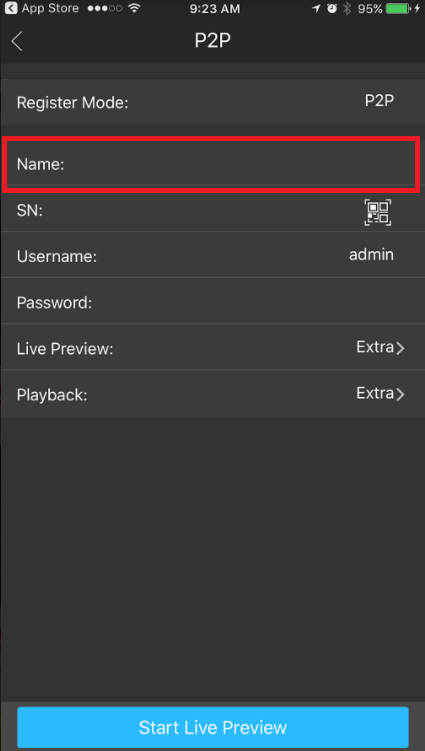
Enter anything in the Name field.
Next you can either enter in the serial number your found in the P2P settings manually or click the icon
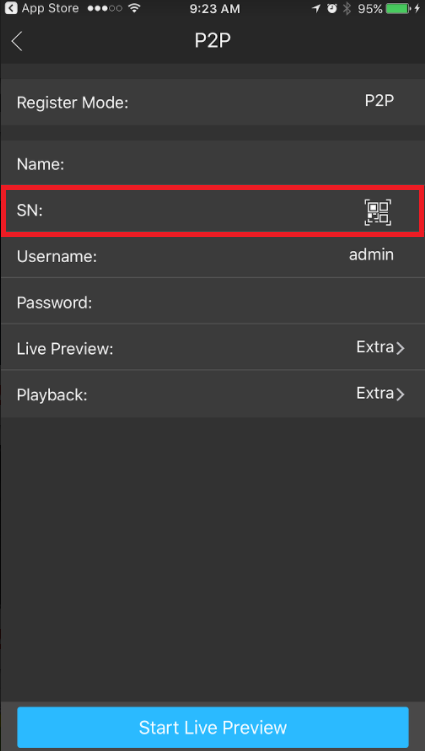
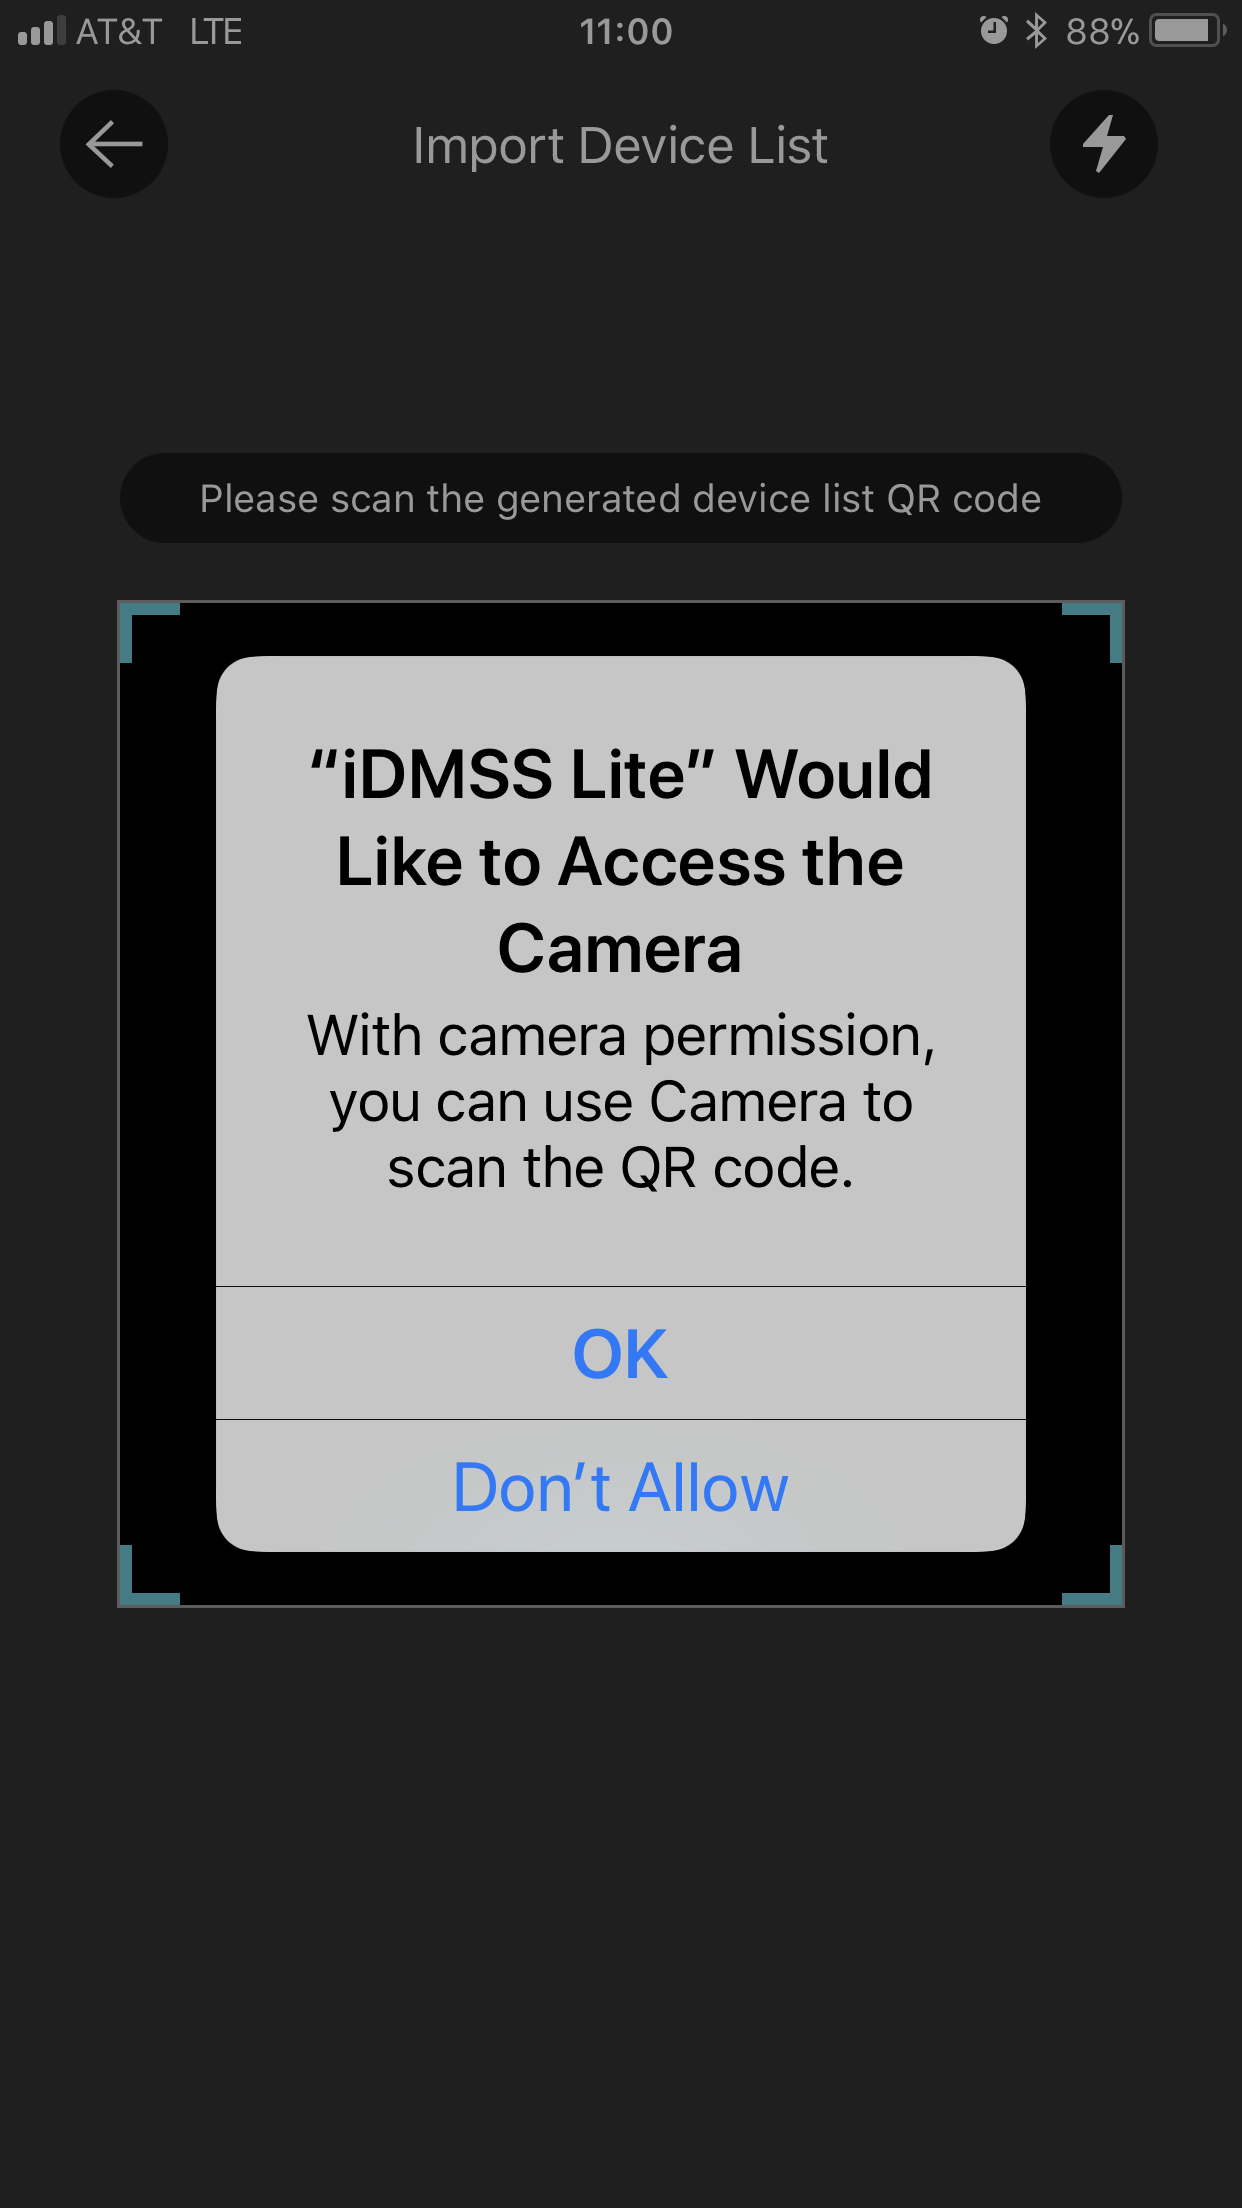
If this is the first time the app has been used to scan a bar code, you will see a prompt asking for permission to use the camera. Click "OK" to use the camera.
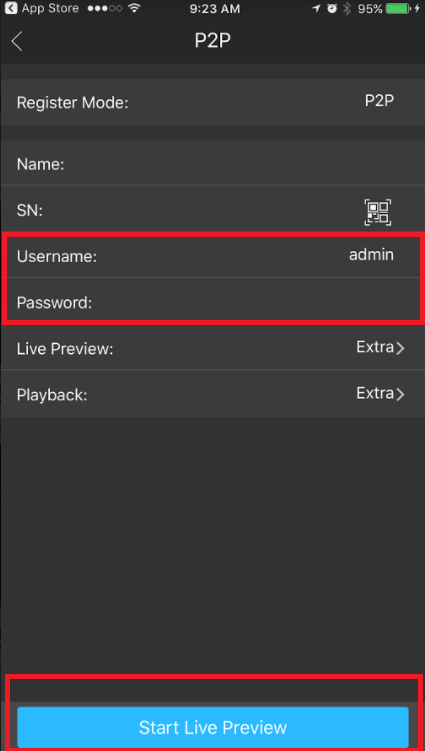
After scanning the code or entering the serial number, next you will enter the username and password of the device and then click "Start Live Preview".
You should now see your cameras.
If you see no cameras in Live View, refer back to the Prerequisites.
If you are sure the prerequisites are good, you may need to change the live view.
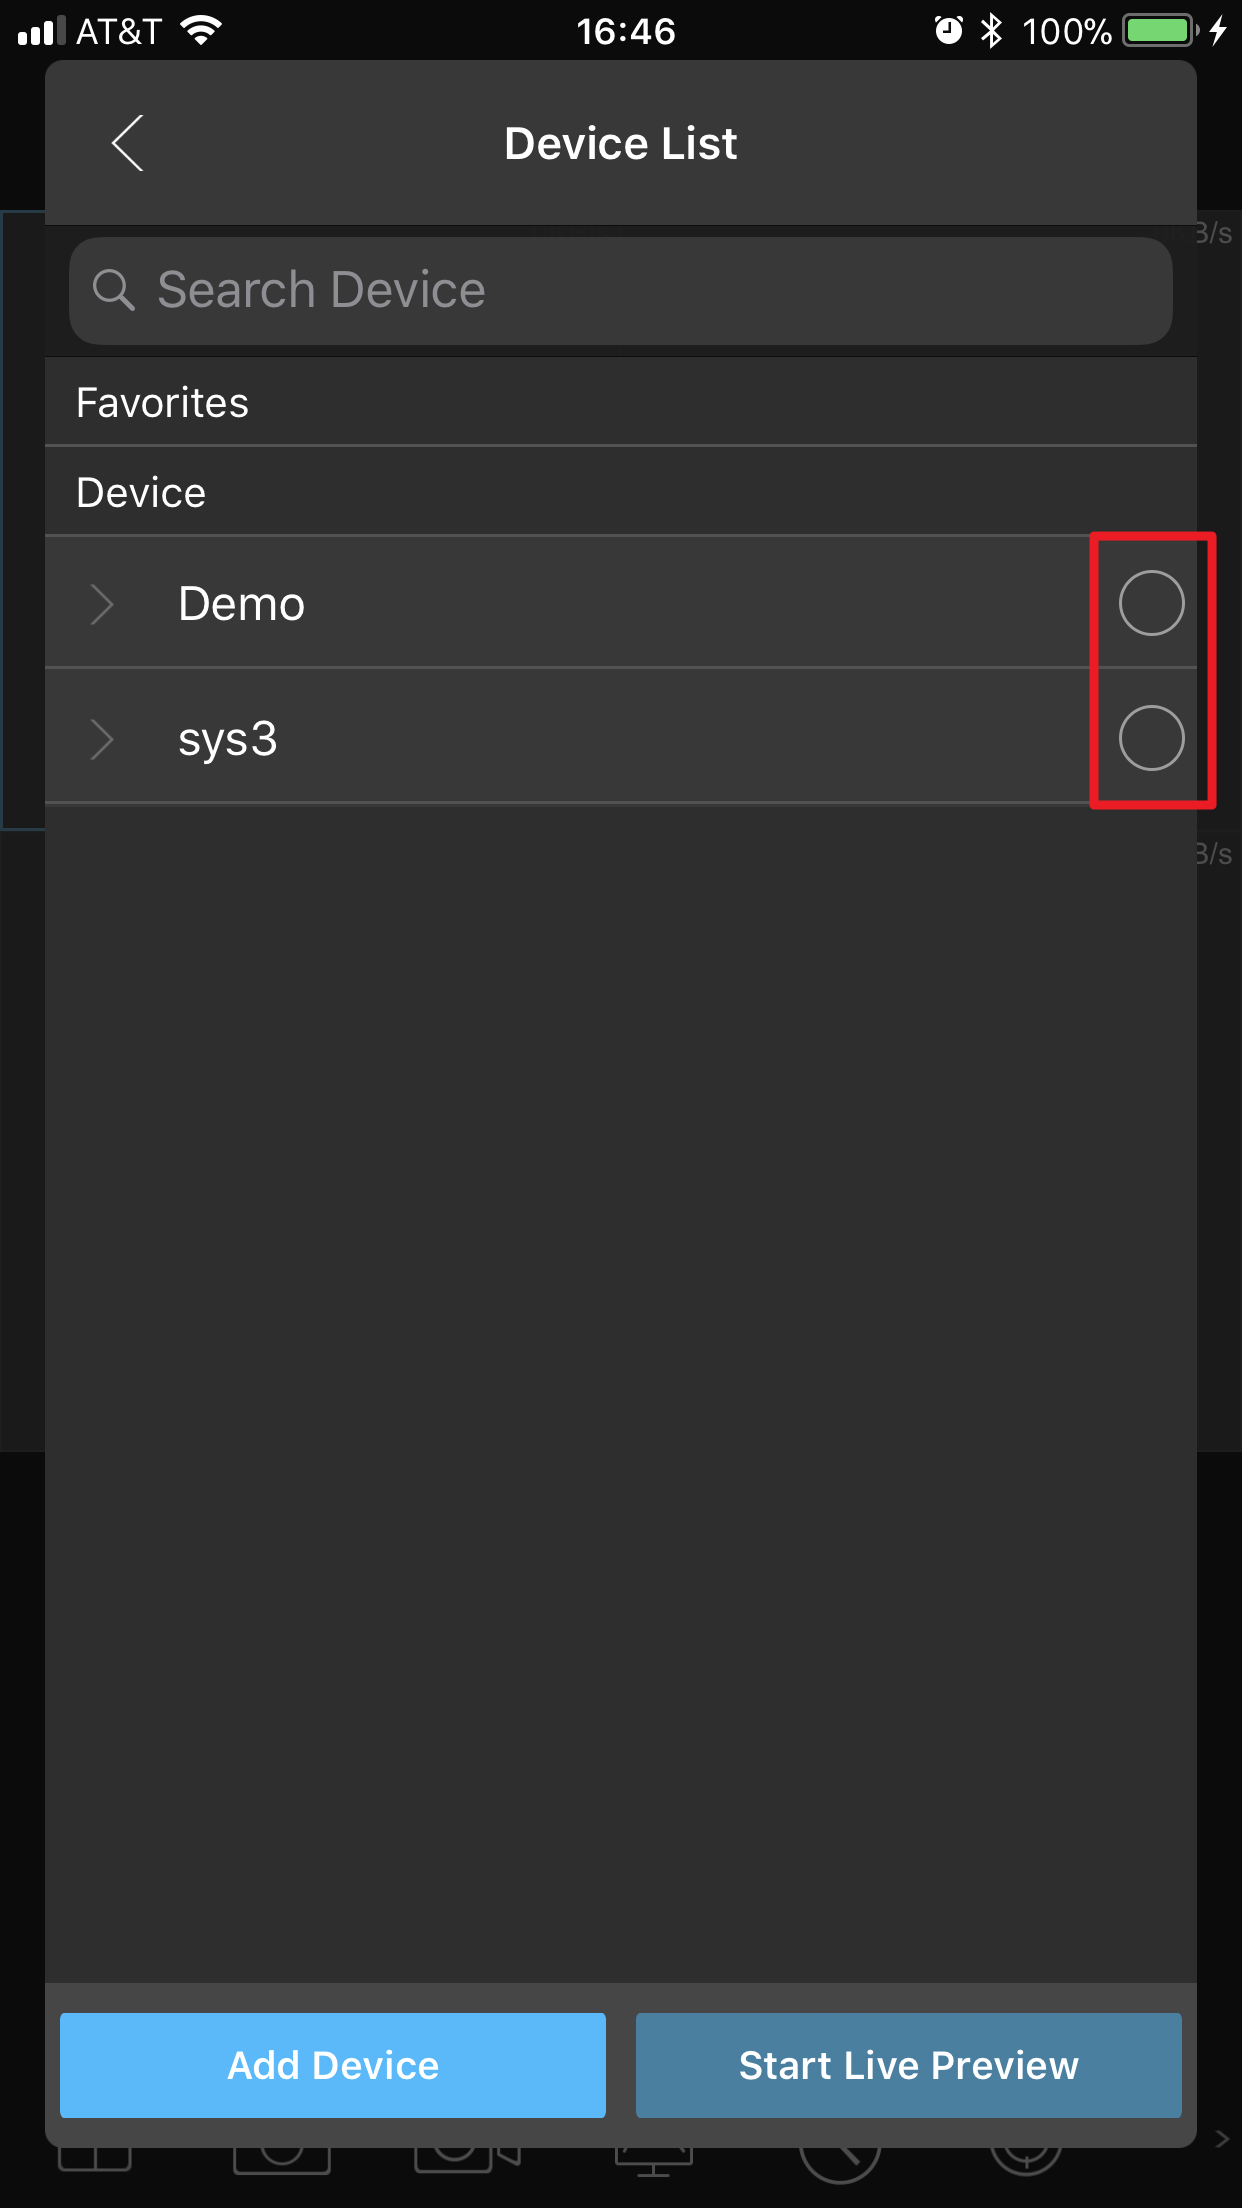
Click the camera icon
Click the circle to the right of a device name and then click "Start Live Preview".